Dog-E
A robot dog with basic interactive functionality. Designed to alleviate loneliness. Gives the best winks. Such a good boy. Wow!
Metadata
June 2019 – 2 weeks
School project on Human Computer Interaction (HCI)
Group of 5 students
Introduction
This project had an interesting setup. Us students would spend roughly 8 weeks in total on this, from start to finish. It started off with 6 weeks of preparation, after which we would spend 2 so called ‘lab weeks’ in a large warehouse, building some sort of product.
In the first 6 weeks, we were introduced to four trendy topics: Wearables (products that you can wear), Artificial creatures (artificial animals), AR/VR (Artificial reality & virtual reality) and playful interfaces. During these weeks, we would attend lectures done by experts in these areas, we would do research into these topics and we would use the knowledge we gained from this to do some short assignments. Definitely a good way to not just learn about these topics, but also to give us an experience as to what it might be like to build something related to one of these topics.
In the end I preferred Artificial creatures. I thought the lecture on that subject was the best. During the lecture they showed some examples of products that you might make if you would choose this topic, and I really bought into it. They showed some videos of people making artificial creatures that were designed to alleviate loneliness. I thought that was really nice, because I think it’s important to do something good for society.
In week 6 everyone was asked what their favorite subject was. That way, the lecturers could group students based on their preferred topic. On day 1 of week 7 everyone was assigned to a group. In general you were grouped with people who had also chosen the same topic. That worked well, because people had more passion, so they worked harder. I was assigned to Artificial Creatures. I really liked that. In the group we were going to do something with that subject. What you ended up building didn’t really matter, as long as it was relevant to the subject.
In the end, we spent 2 weeks building a cool little robot dog. During this process, we made sure to capture as much of the experience as possible. We took lots of pictures, wrote daily reports and we’ve also made plenty of videos. If you’re interested in following along with the entire process, then feel free to read on. If you’re short on time, I would recommend checking out the aftermovie, made by my lovely teammate, Hiba. If you want even more content, then I would recommend checking out the original website I made for this project. This also contains plenty of content from the first 6 weeks of the project.
Day 1
Day 1 started with a general briefing. This explained what the intention was for the next two weeks. A number of safety rules were explained and it was stated that student assistants would be present. After the briefing, people started looking for the forms that stated who you would be in a group with. I was in a group with Dennis, Nicolette, Danique and Hiba.
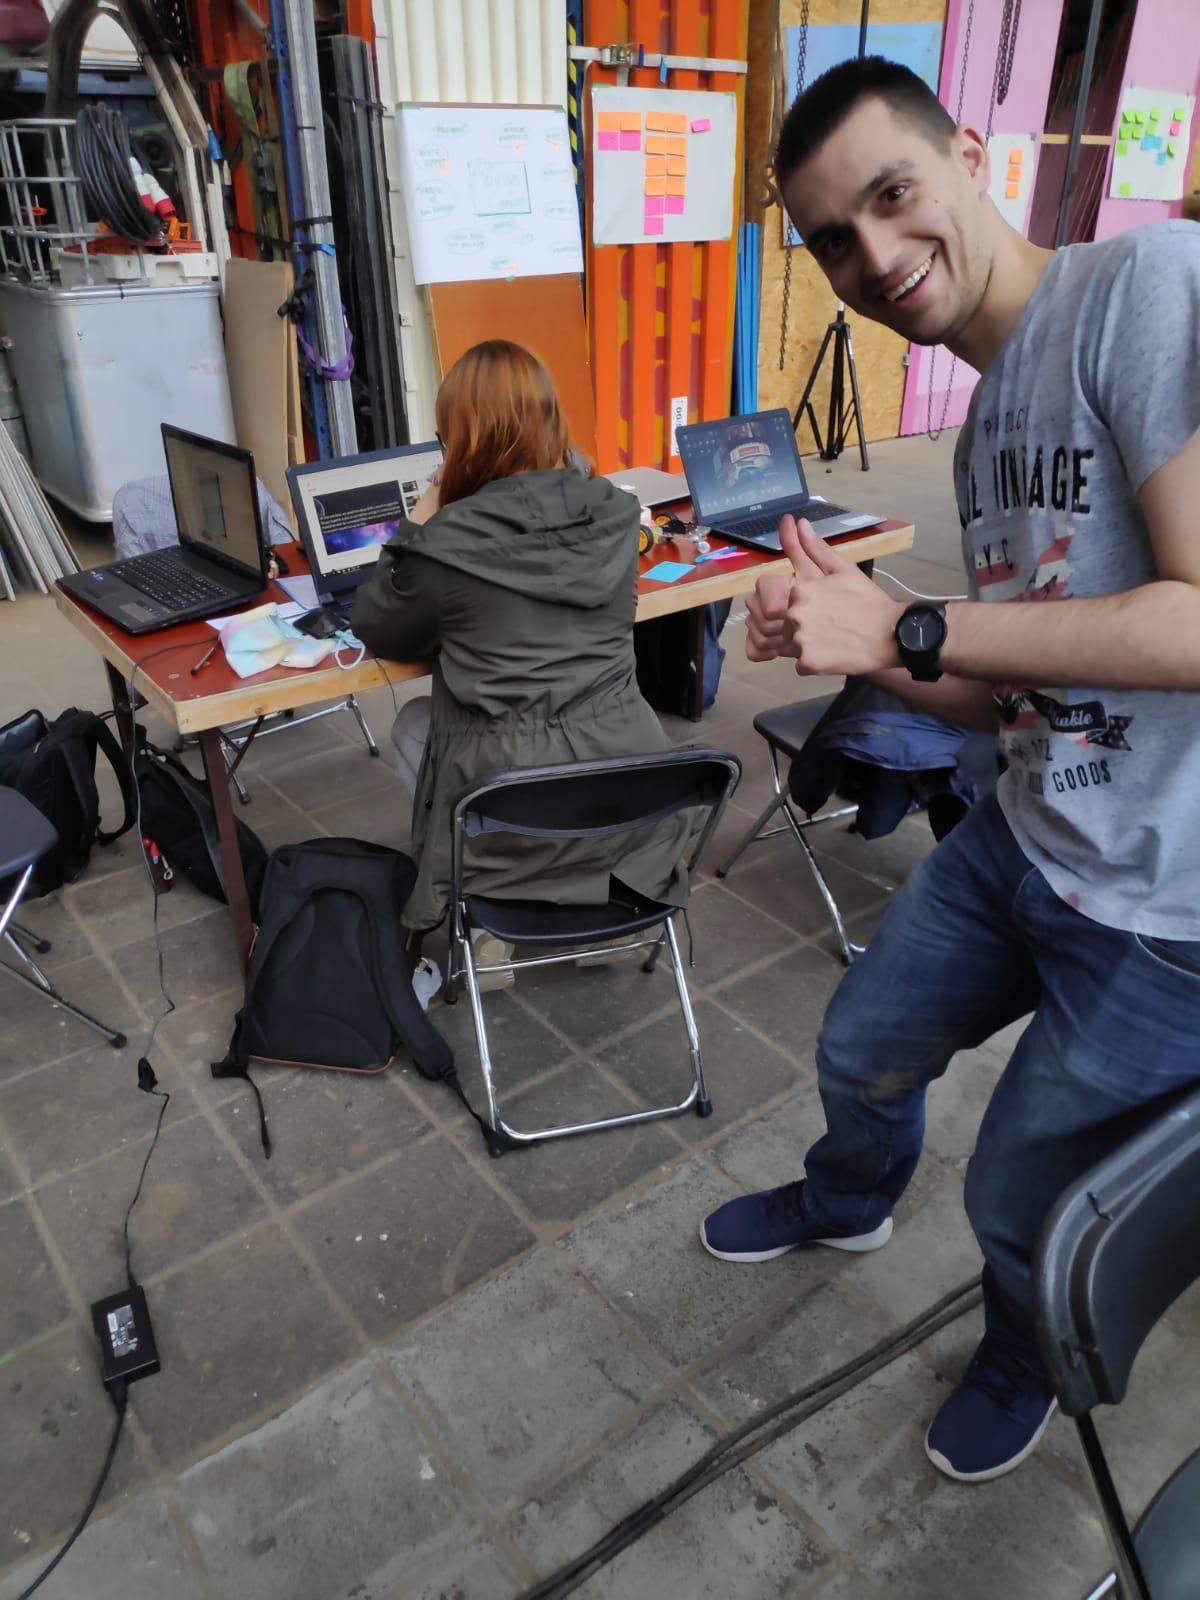
First of all, we started by setting up our workspace. There were fold-out tables and fold-out chairs. With this we have created a workplace. See photo below.
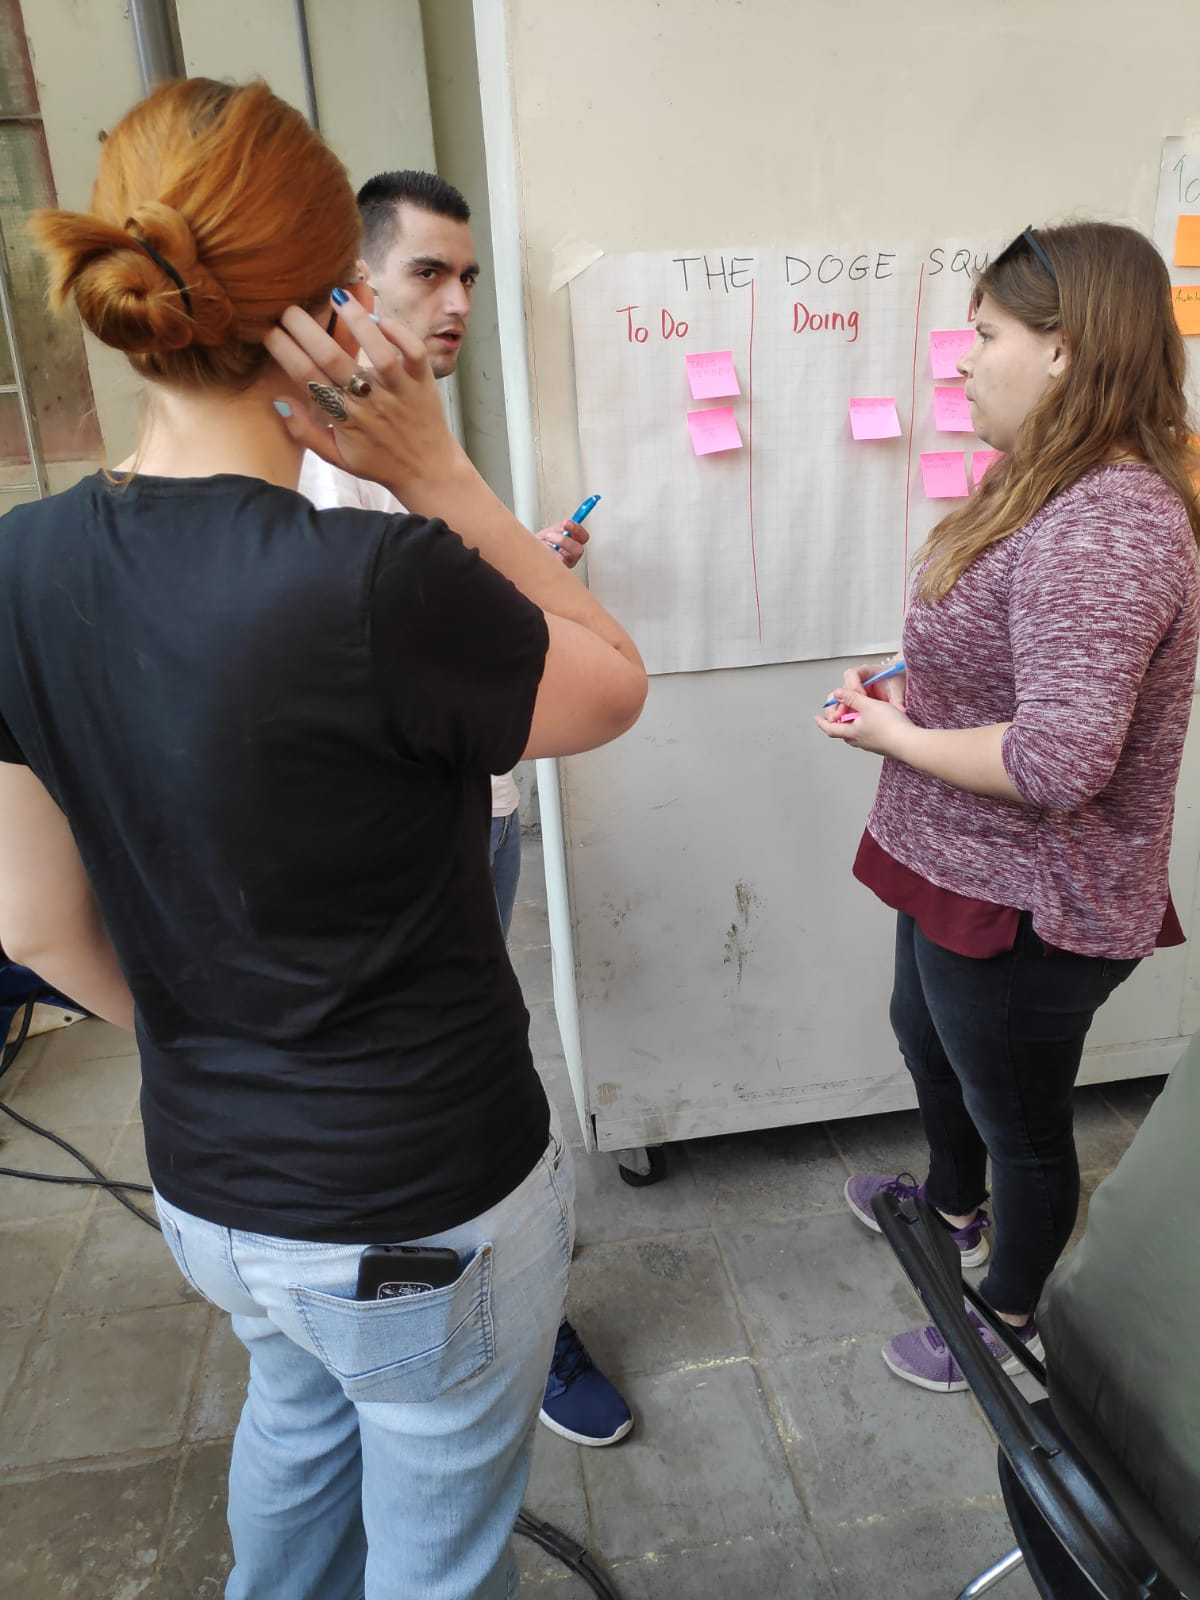
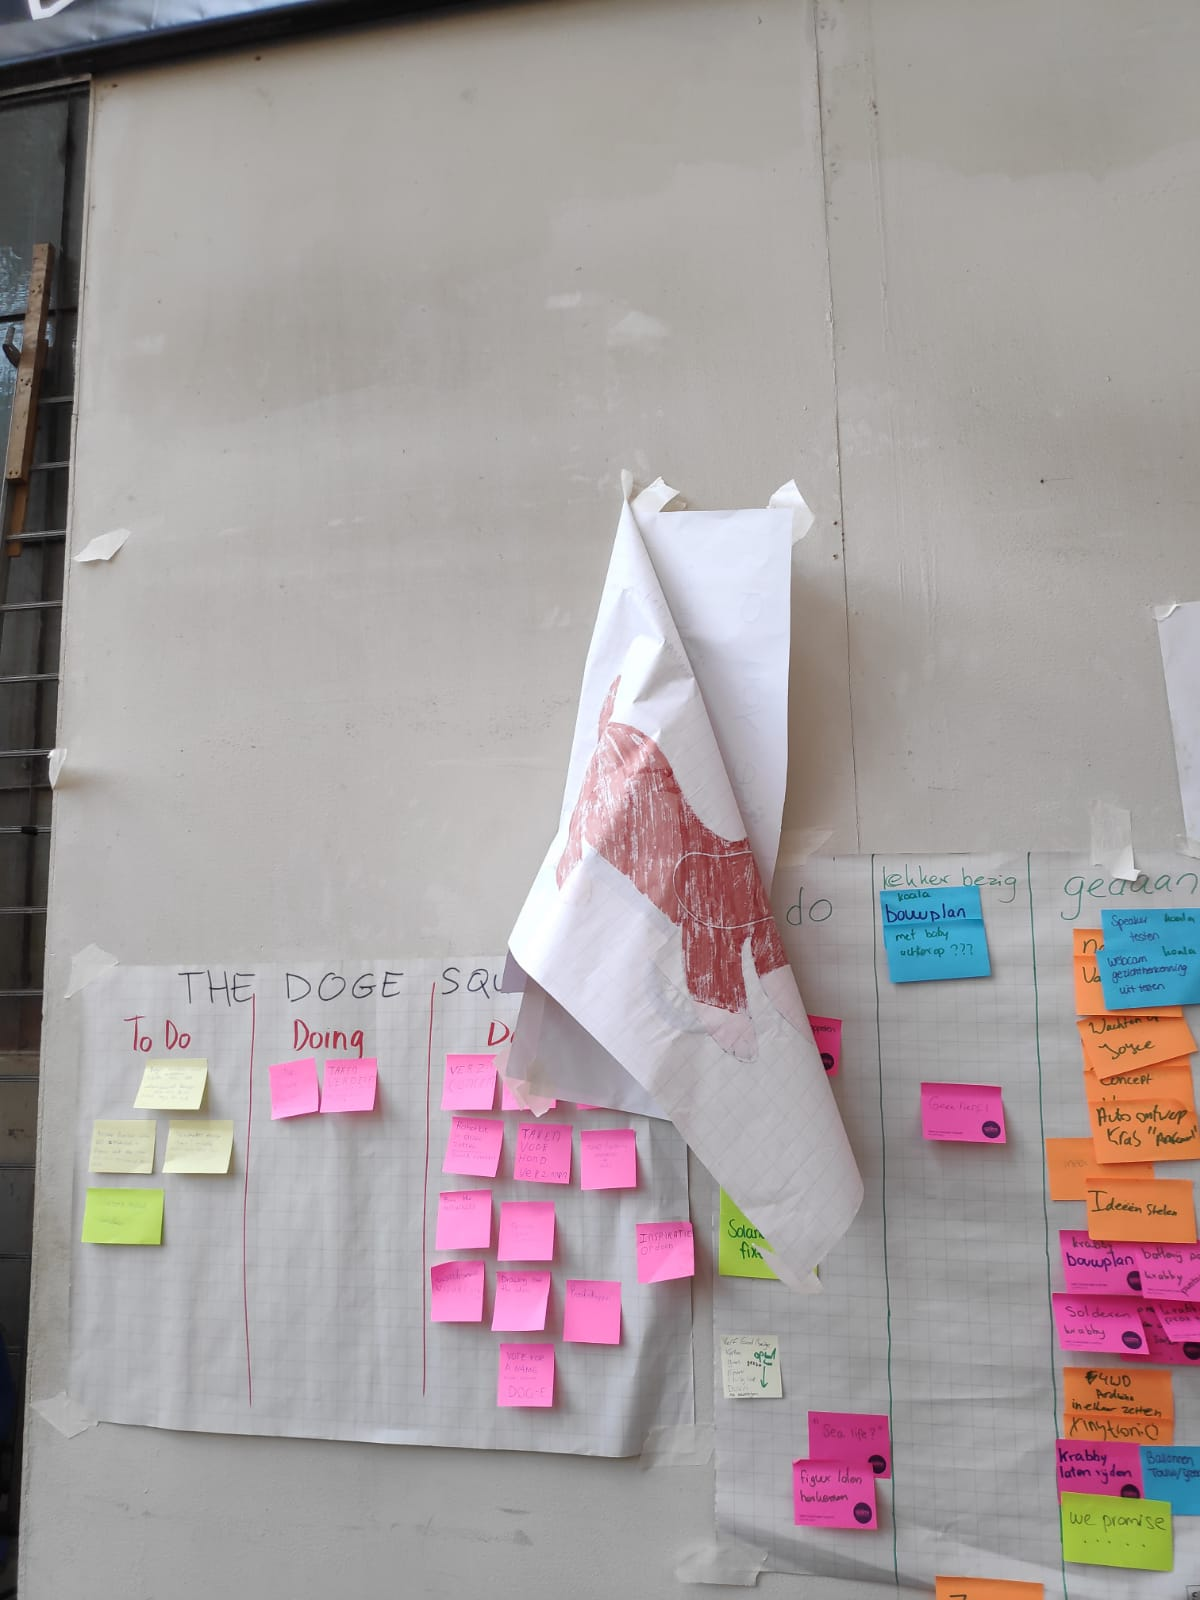
The teachers advise us to use the SCRUM method. That meant we grabbed a large sheet of paper. That sheet looks like the images below.
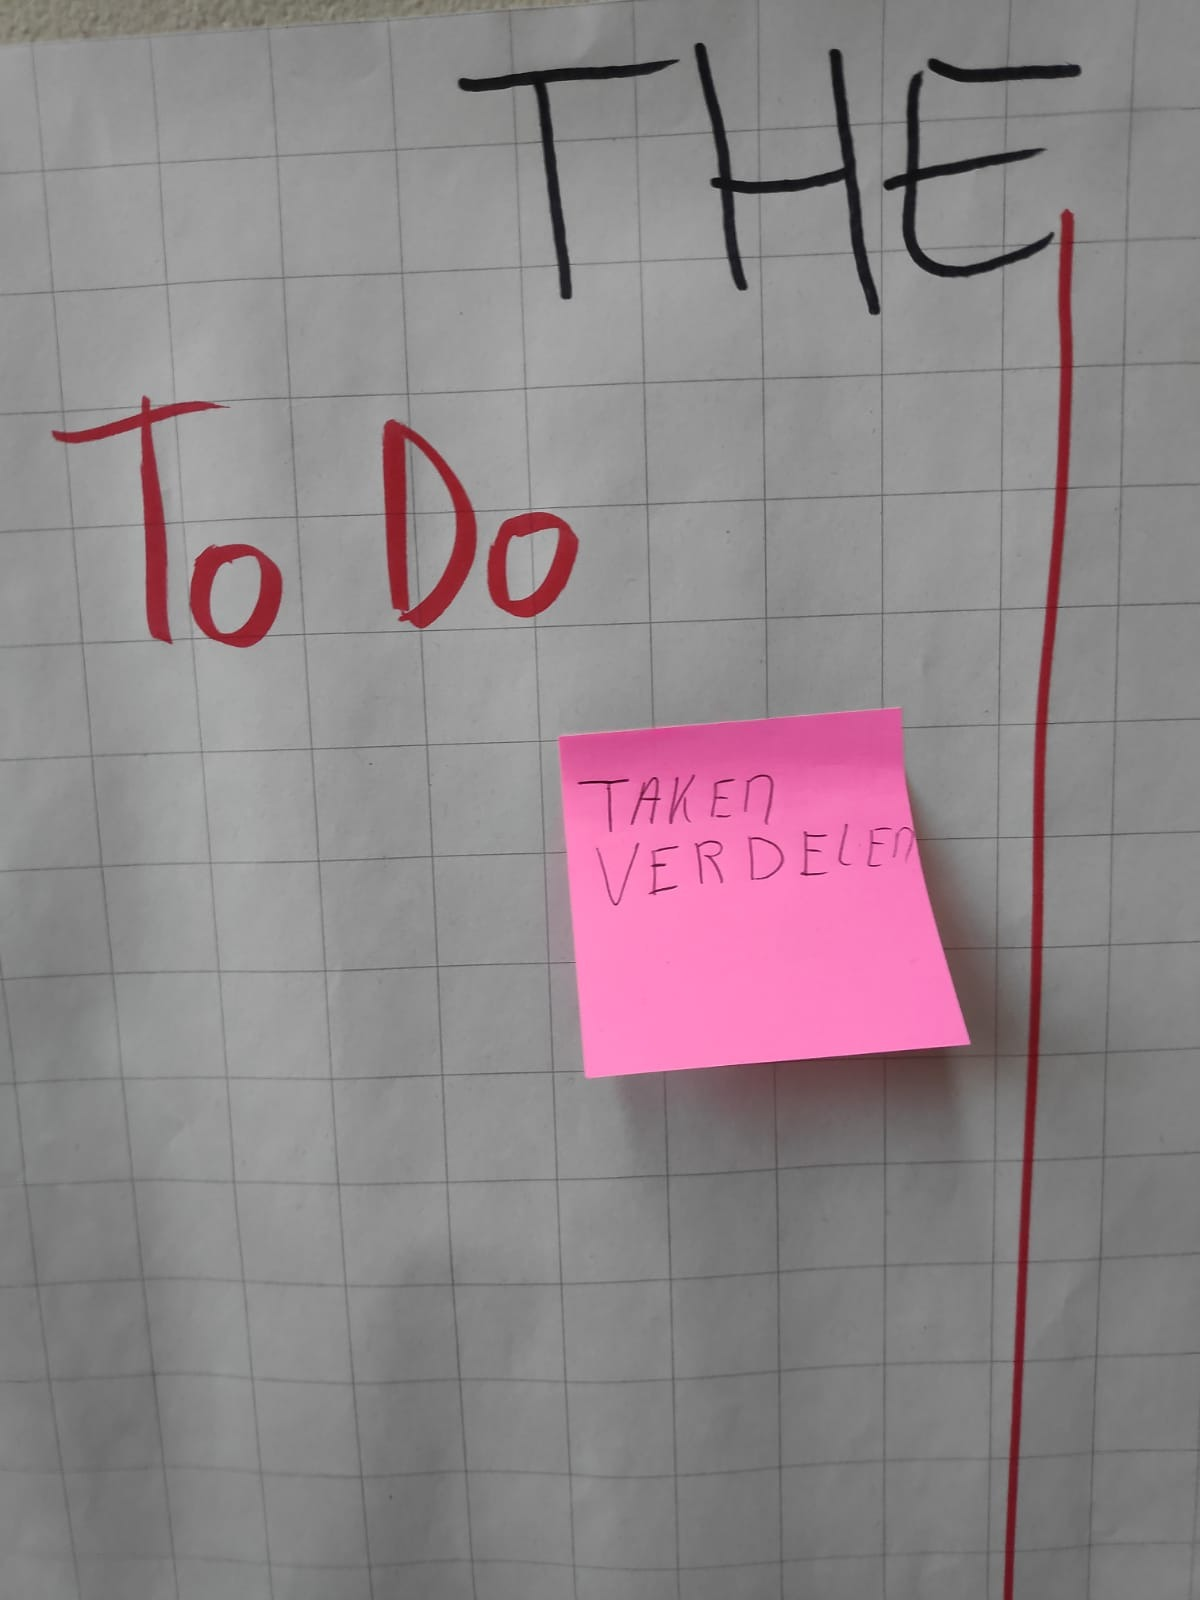
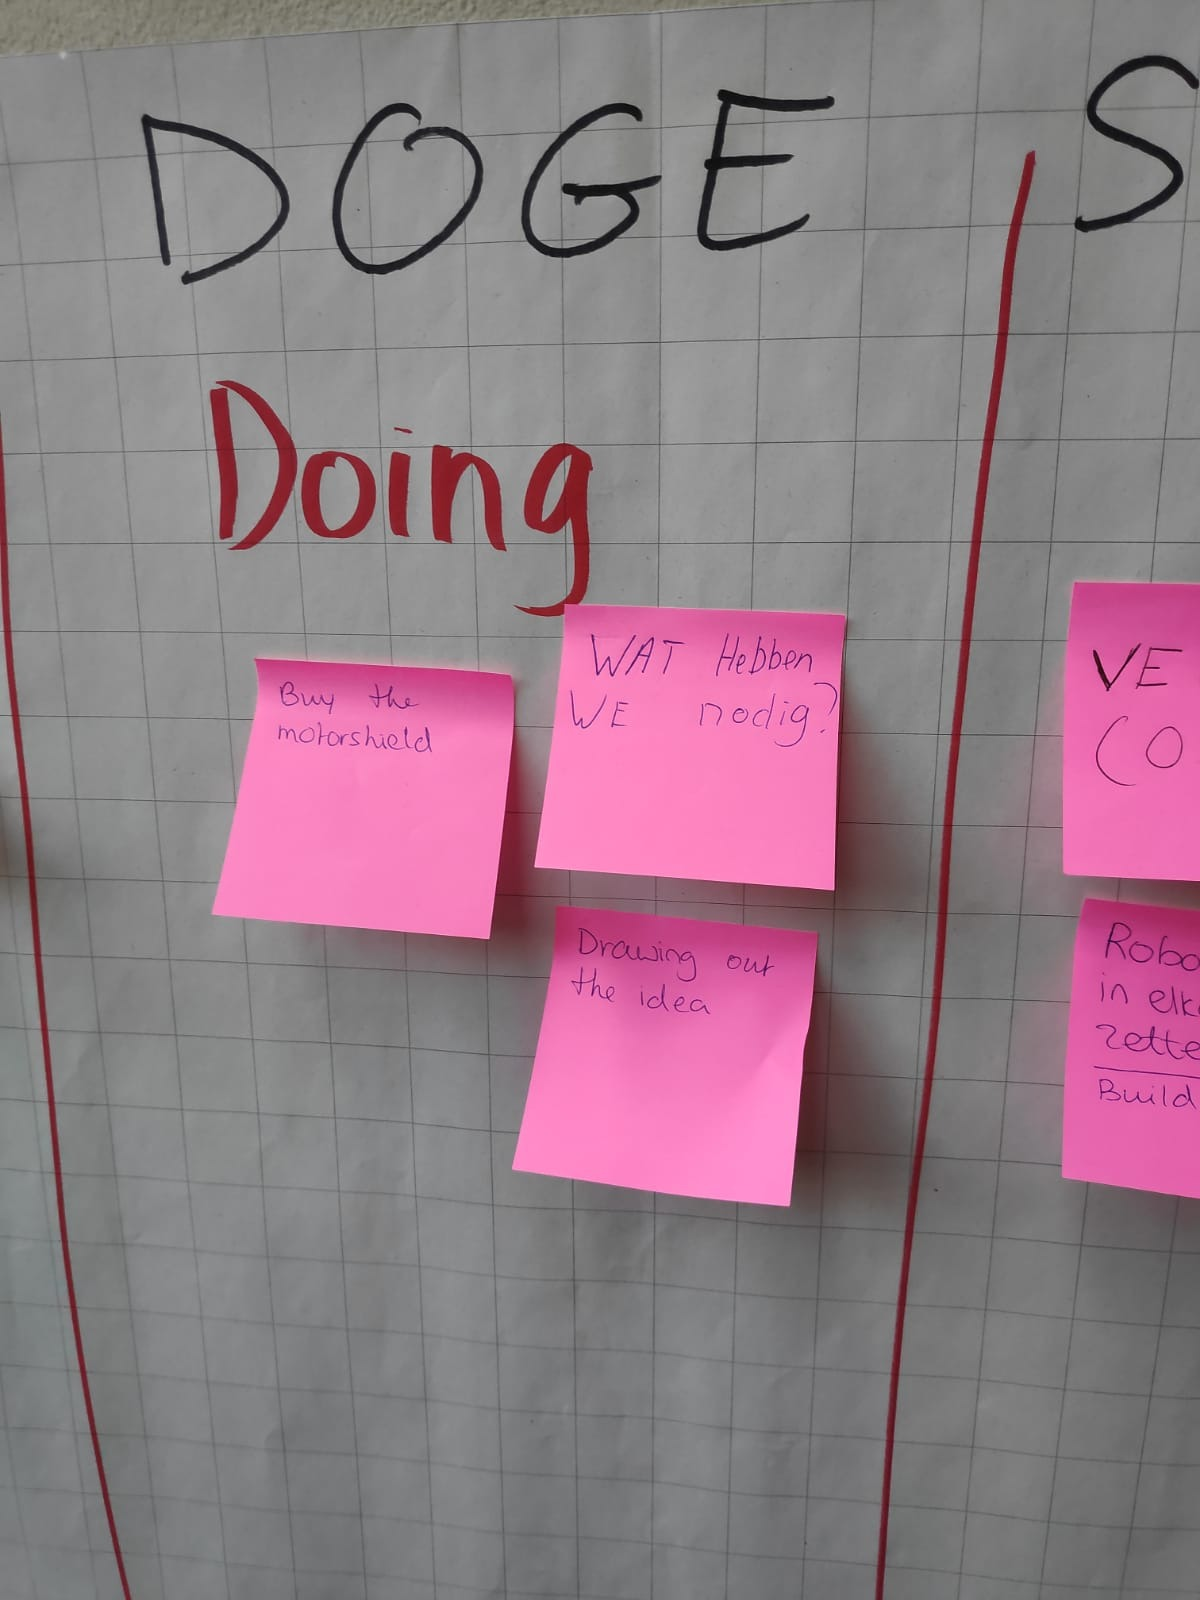
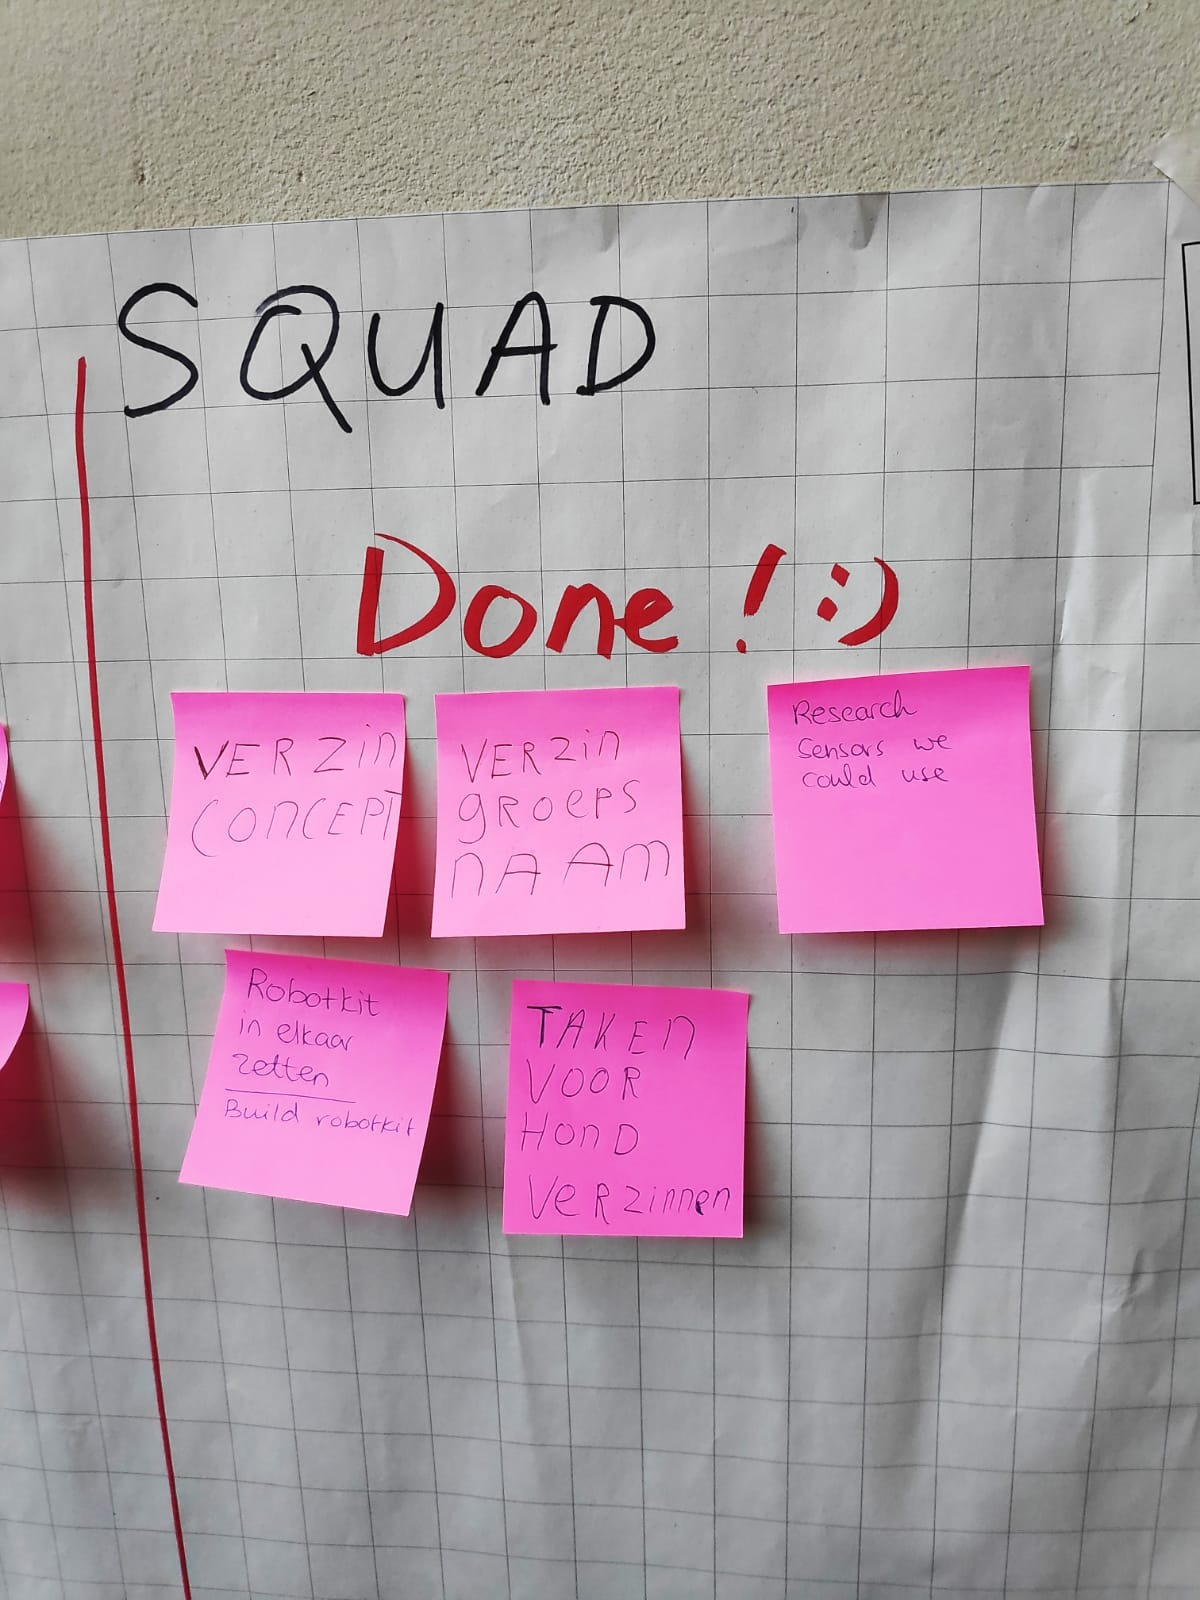
As you can see, 3 columns have been created on the sheet: To do, doing & done. This allows us to better keep track of what still needs to be done, what we are doing and what has already been done. By using post-its the sheet itself remains neat. The photos of the SCRUM sheet were taken at the end of the day. As a group we started coming up with concepts and a group name. Hiba immediately started making a mind map. The group came up with all kinds of ideas for our concept. Because our subject was ‘Artificial Creatures’, we soon started thinking about all kinds of shapes, for example animals. From dogs and cats to snails and turtles, we had all kinds of different ideas. See image below.
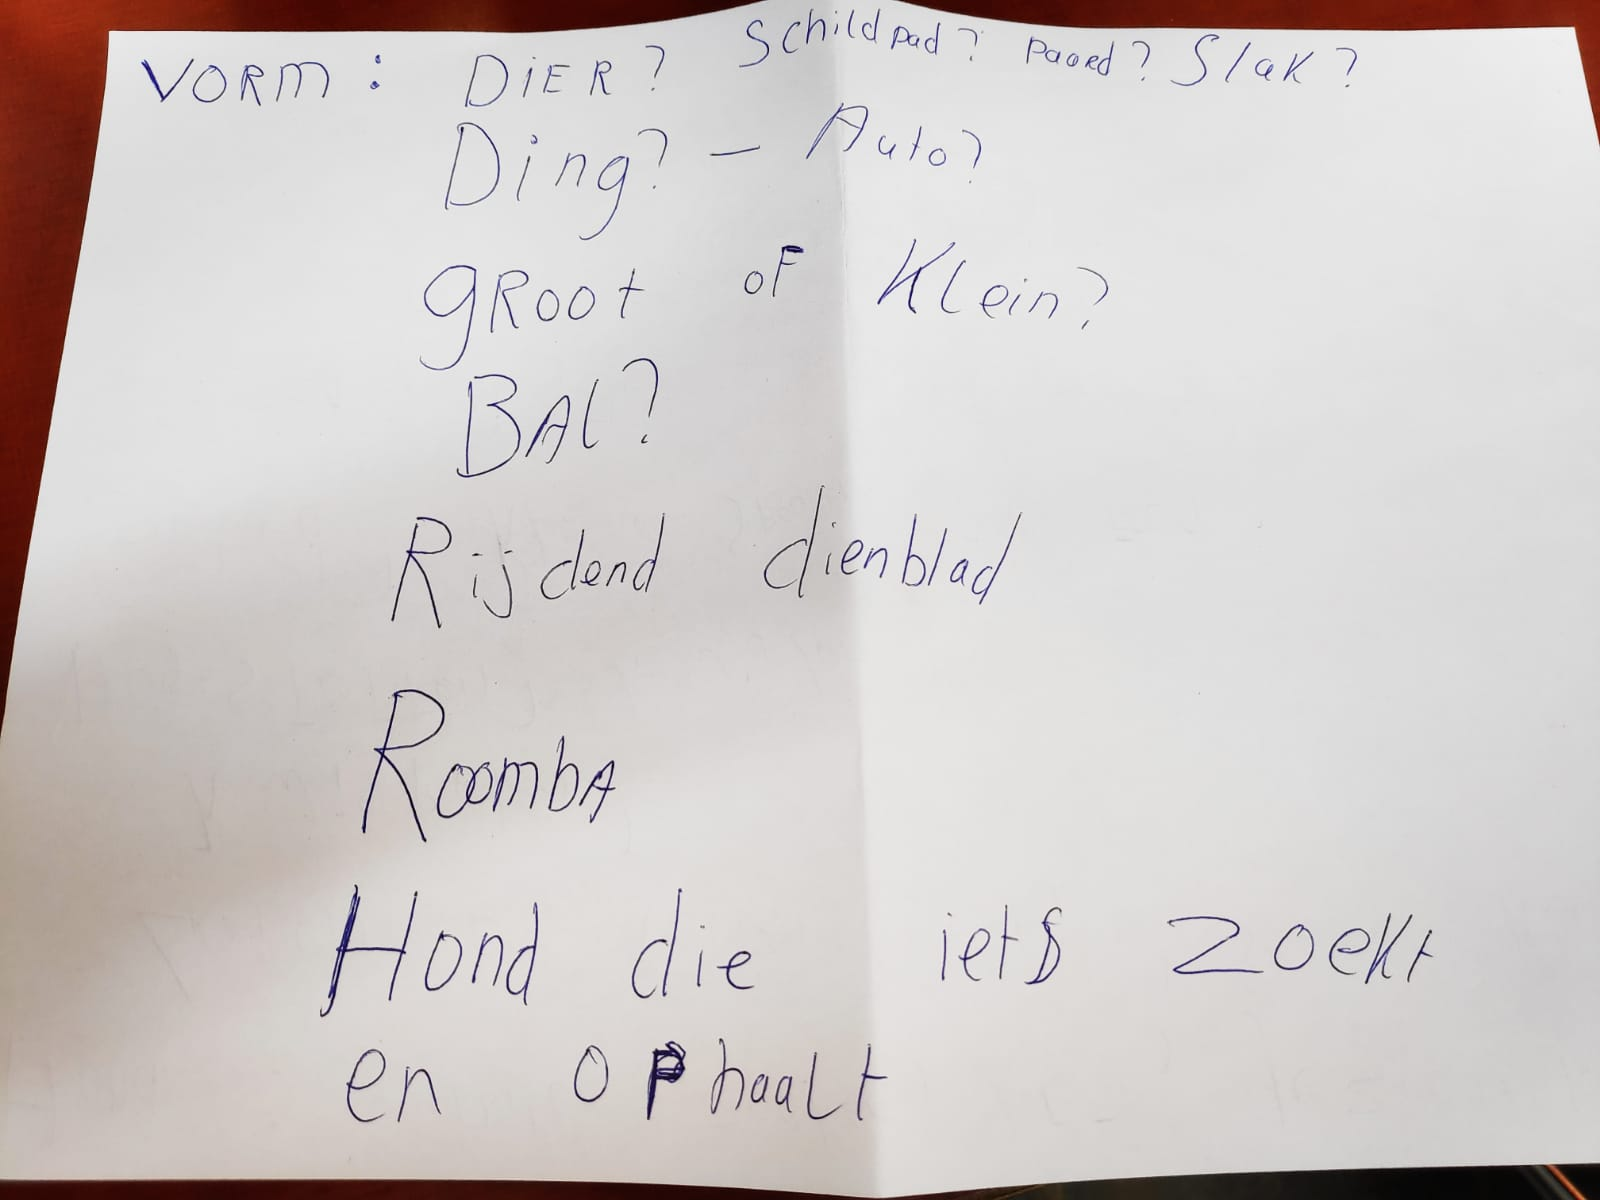
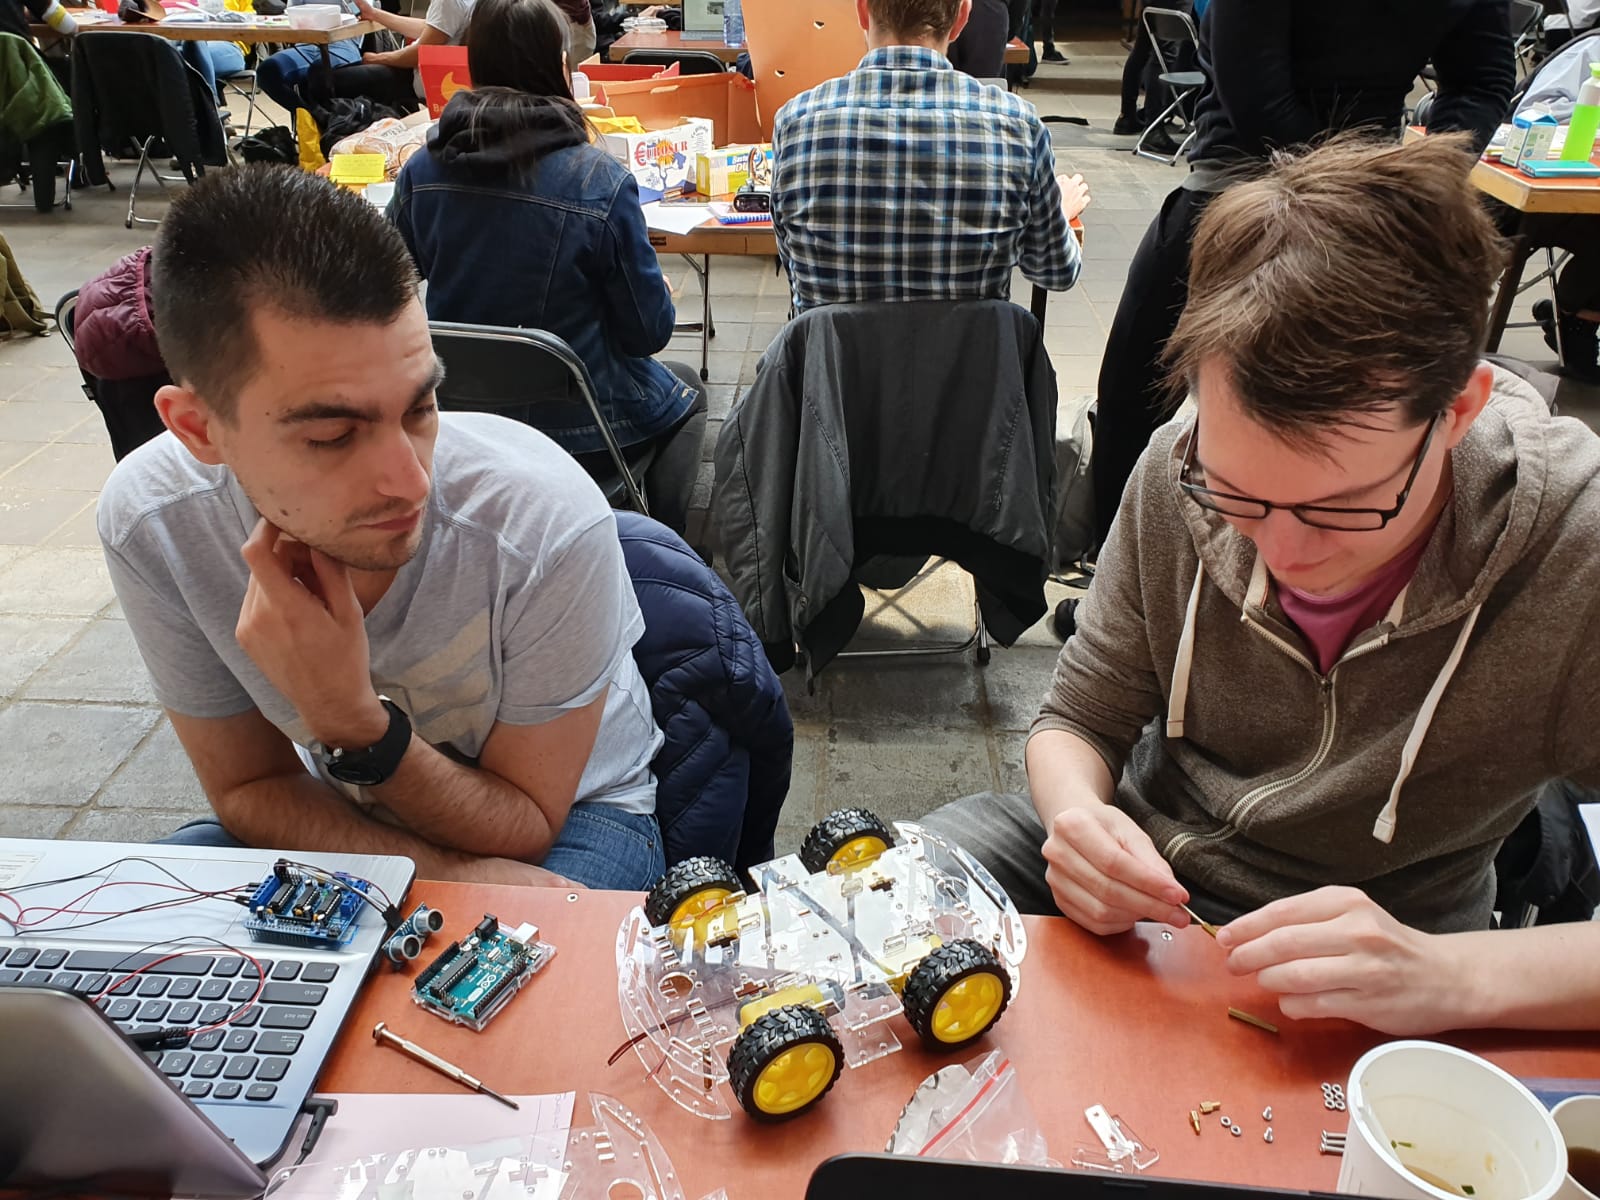
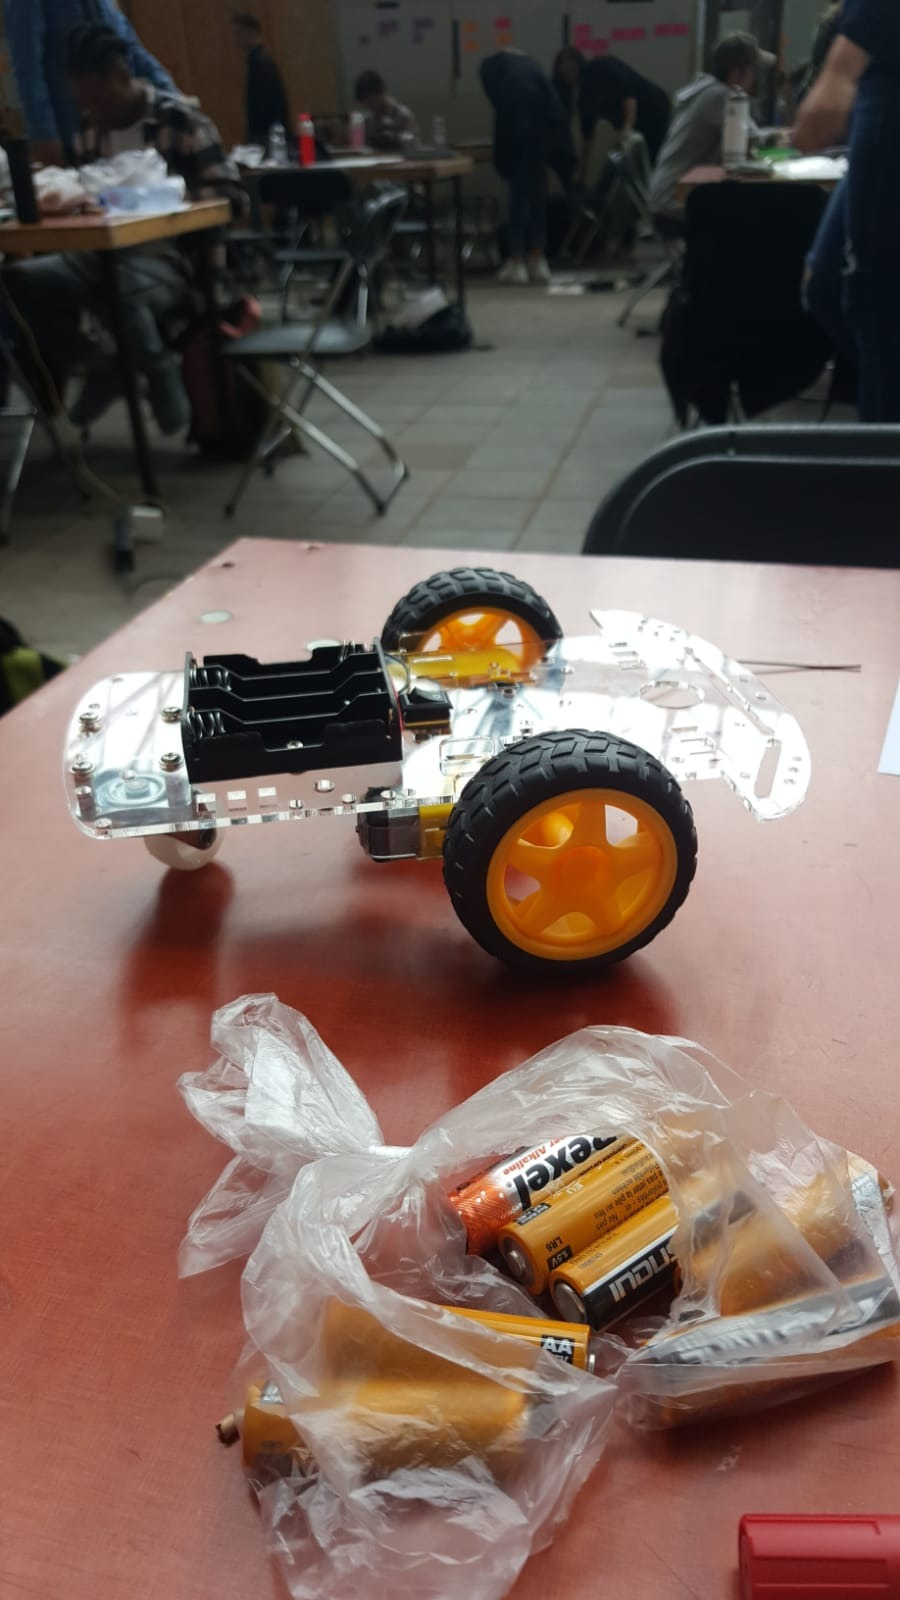
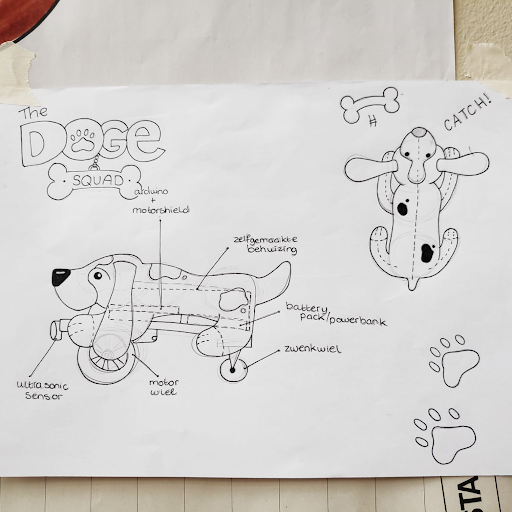
Not only about which animal our creation should be, but also about how the animal should move. We soon decided that we wanted to make a robot dog. In addition, we wanted to work with wheels instead of legs because that would probably be easier. Dennis then consulted with Chris Heydra. Dennis then returned a little later with a kit for a small car. We put that car together. See image below.
The robot dog had to at least be able to move in a certain way. We had already established this base when assembling the car. We were satisfied with this. Still, we wanted the robot dog to be able to do more than just walk. Yannick then made the following sheet with all kinds of things that the dog could possibly do:
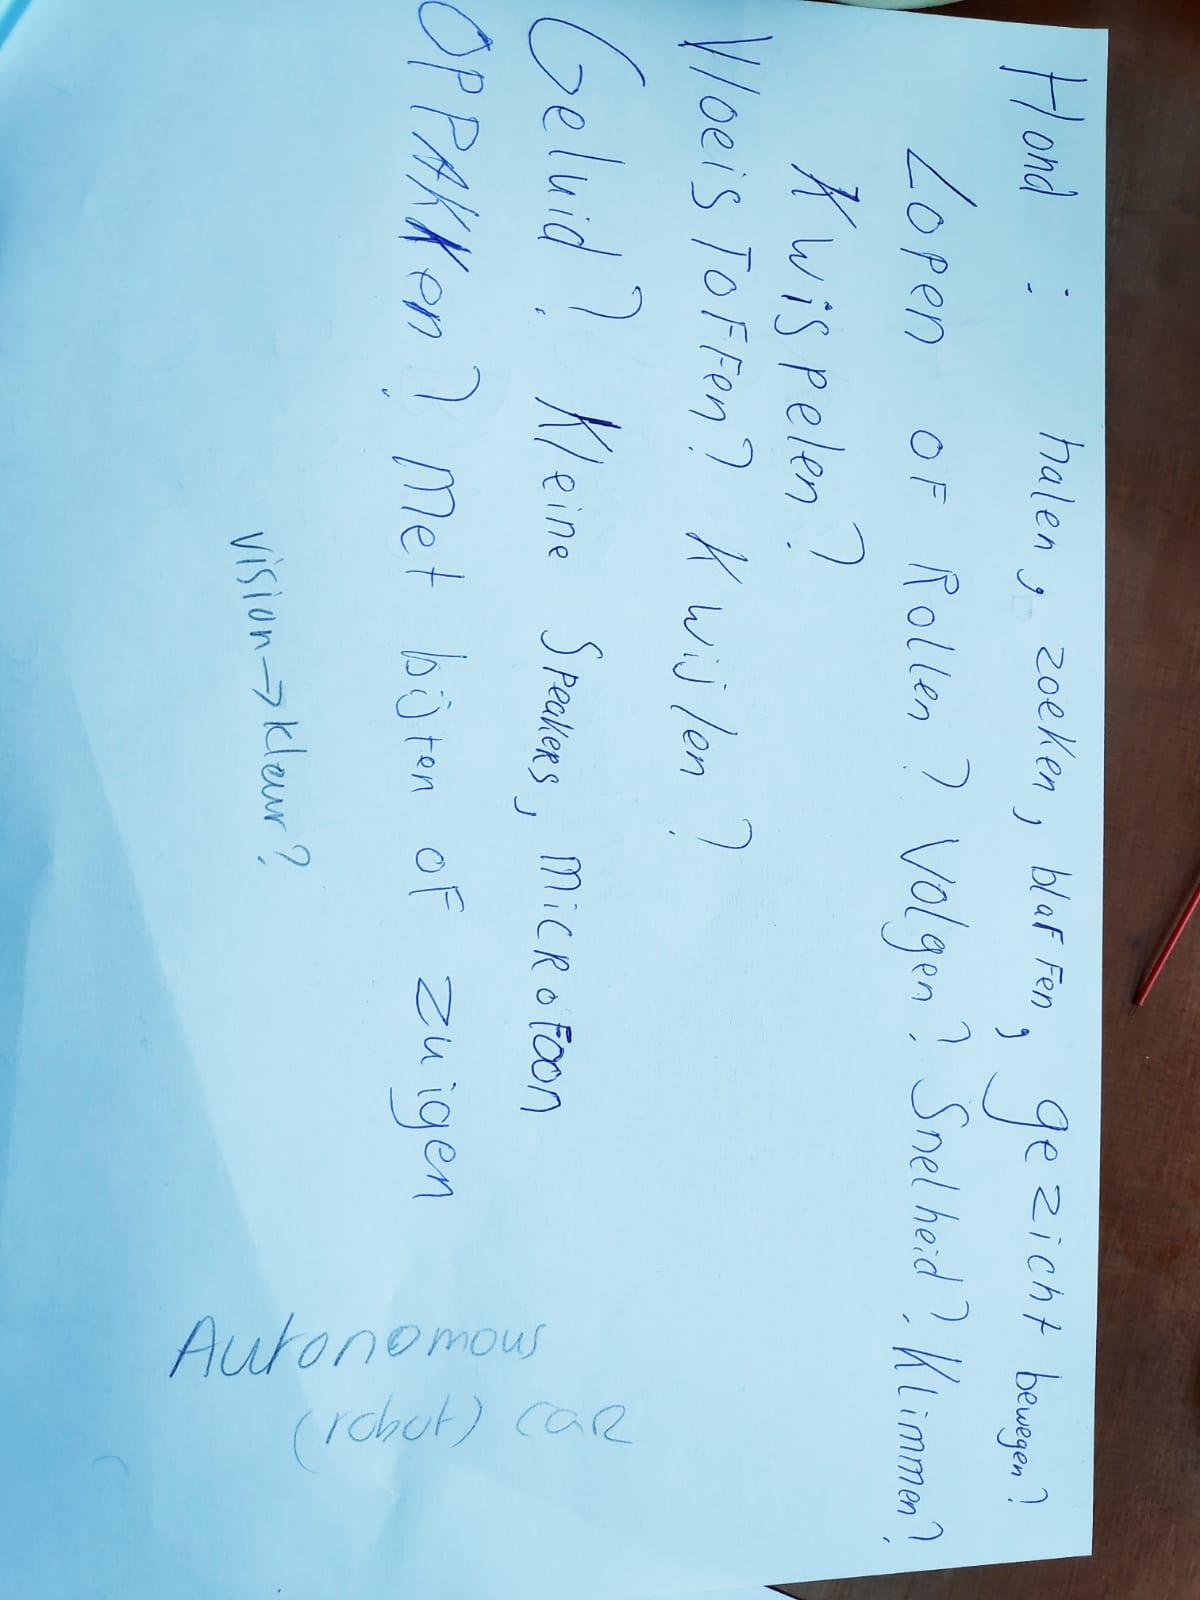
By describing all kinds of typical dog activities, we could make choices together as a group. For example, we first wanted to focus on making the robot dog move in a targeted manner. However, to achieve this, additional parts were needed. Parts that we did not have yet at that time. As a group we decided to order the parts. Hopefully they would arrive the next day.
Day 2
Today we worked with 4 people because of Eid-al-Fitr. Fortunately, we were a lot better prepared than the previous day. We brought more things with us, such as Arduinos and screwdrivers, that we actually wanted to have on day 1. We also found our workplace a bit uncomfortable, so Dennis brought a kettle and a sandwich maker. See the images below made by Yannick.
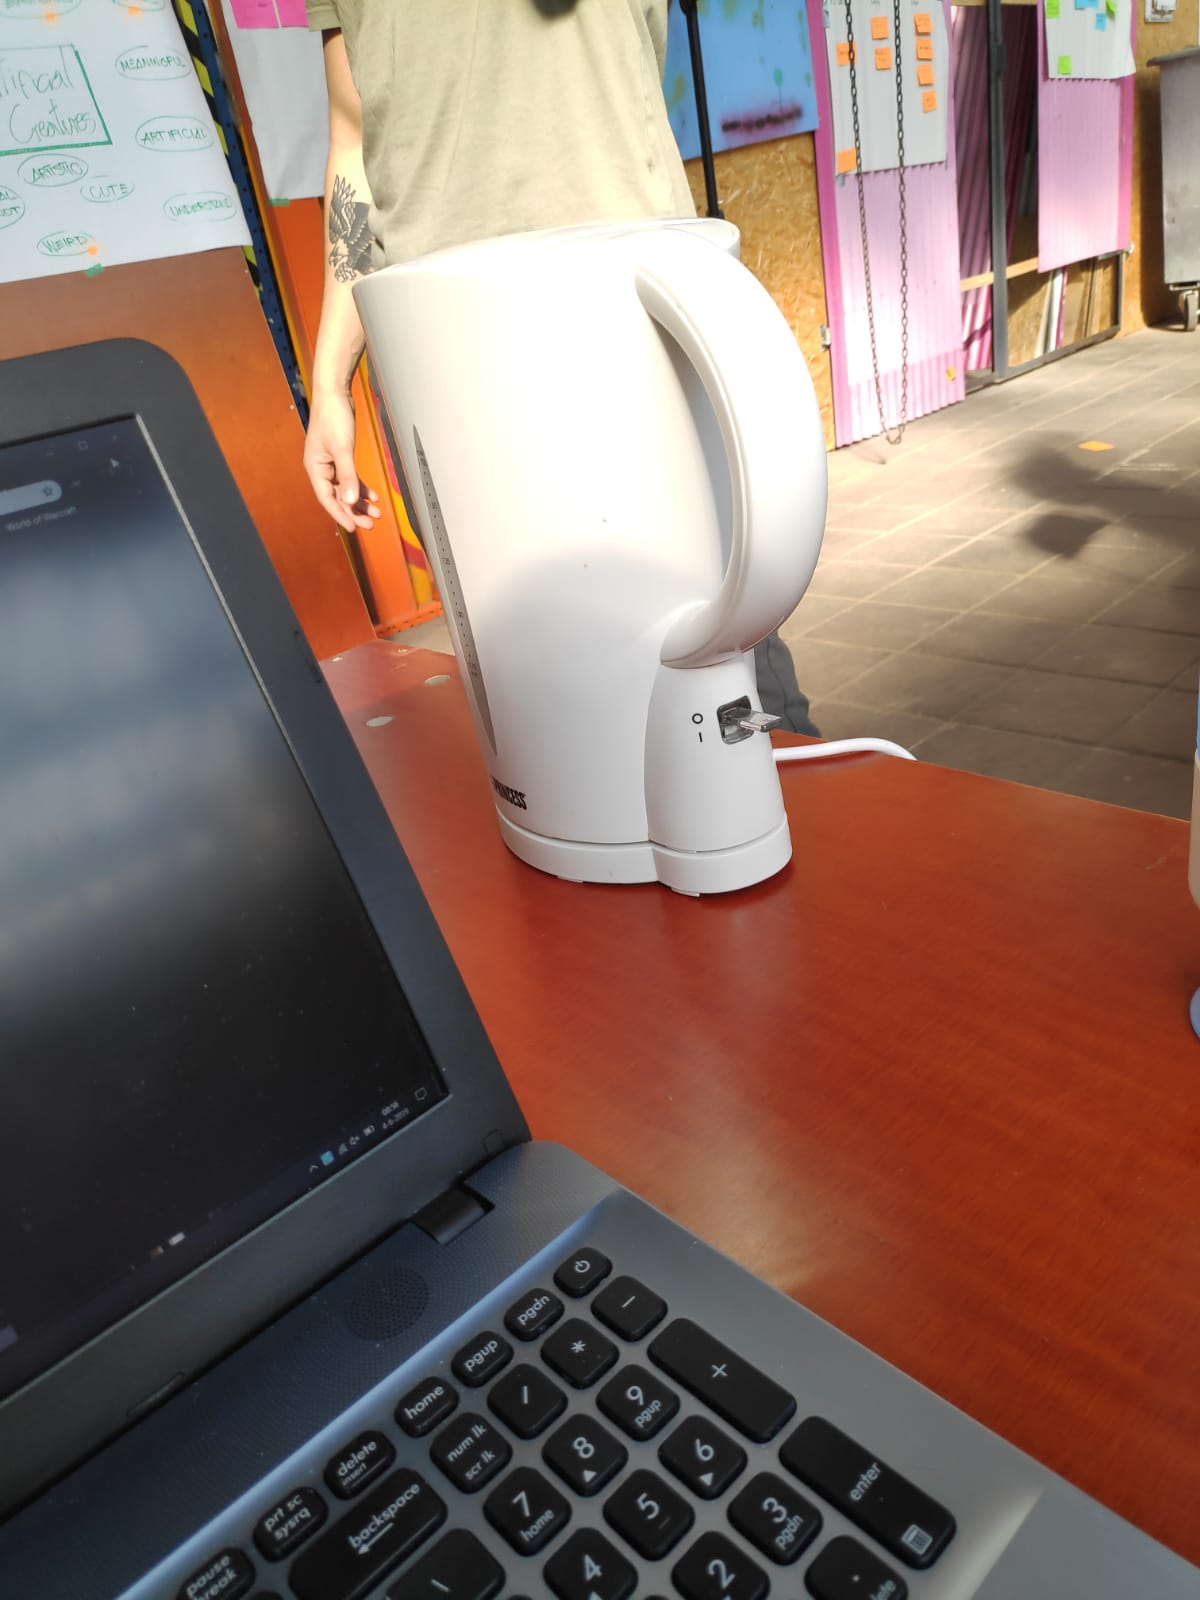
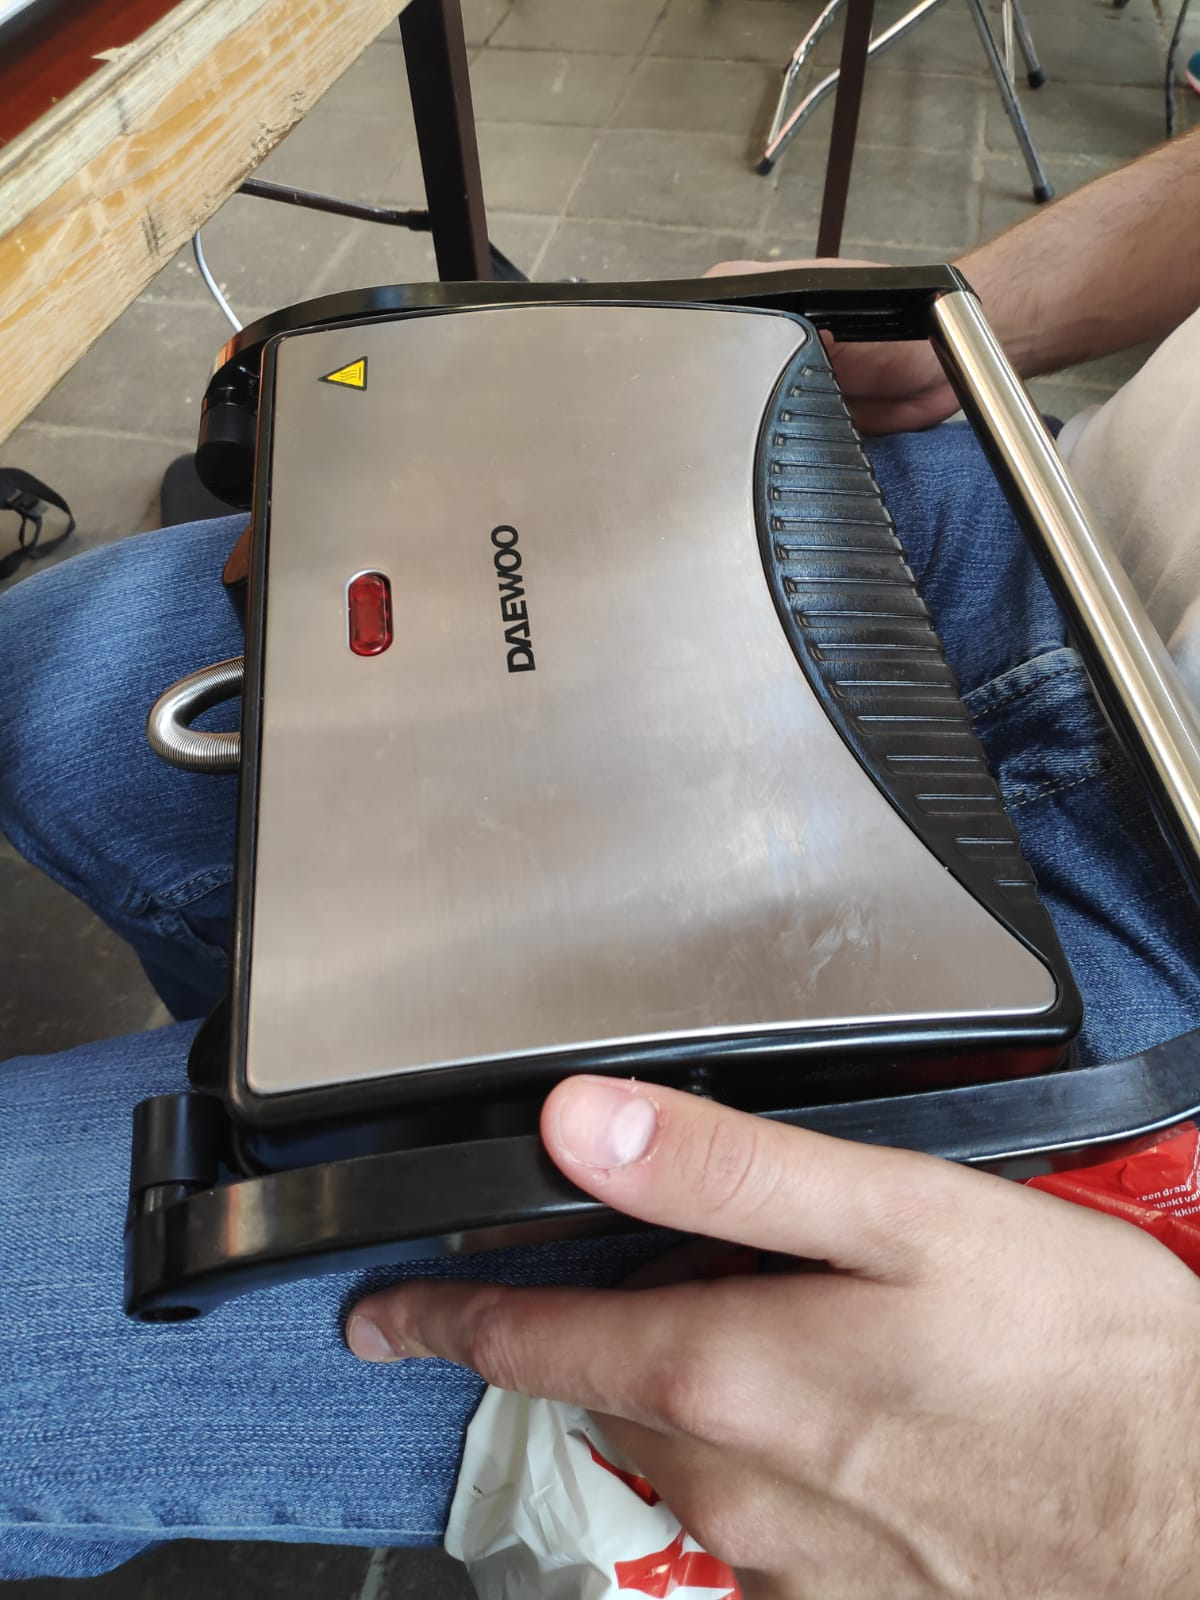
The group really liked this. A nice, comfortable workplace is half the battle. This was followed by the daily briefing. The concept of the Daily Stand Up was explained. Stand around the doing, to do & done sheet as a group to discuss our progress. We did that. Day 2 was mainly about waiting for parts that we ordered on day 1.
In preparation, on days 1 & 2 we worked on gaining knowledge about how to work with the car. We looked at all kinds of different projects that other people have published on the internet. At the end of day 2 the car was able to drive short distances. The car was still attached to the cable. Tomorrow (day 3) we want to see if we can also drive without a cable. We also want to see if we can drive straighter. Currently the driving is still very crooked, while we only give commands to drive forward.
Day 3
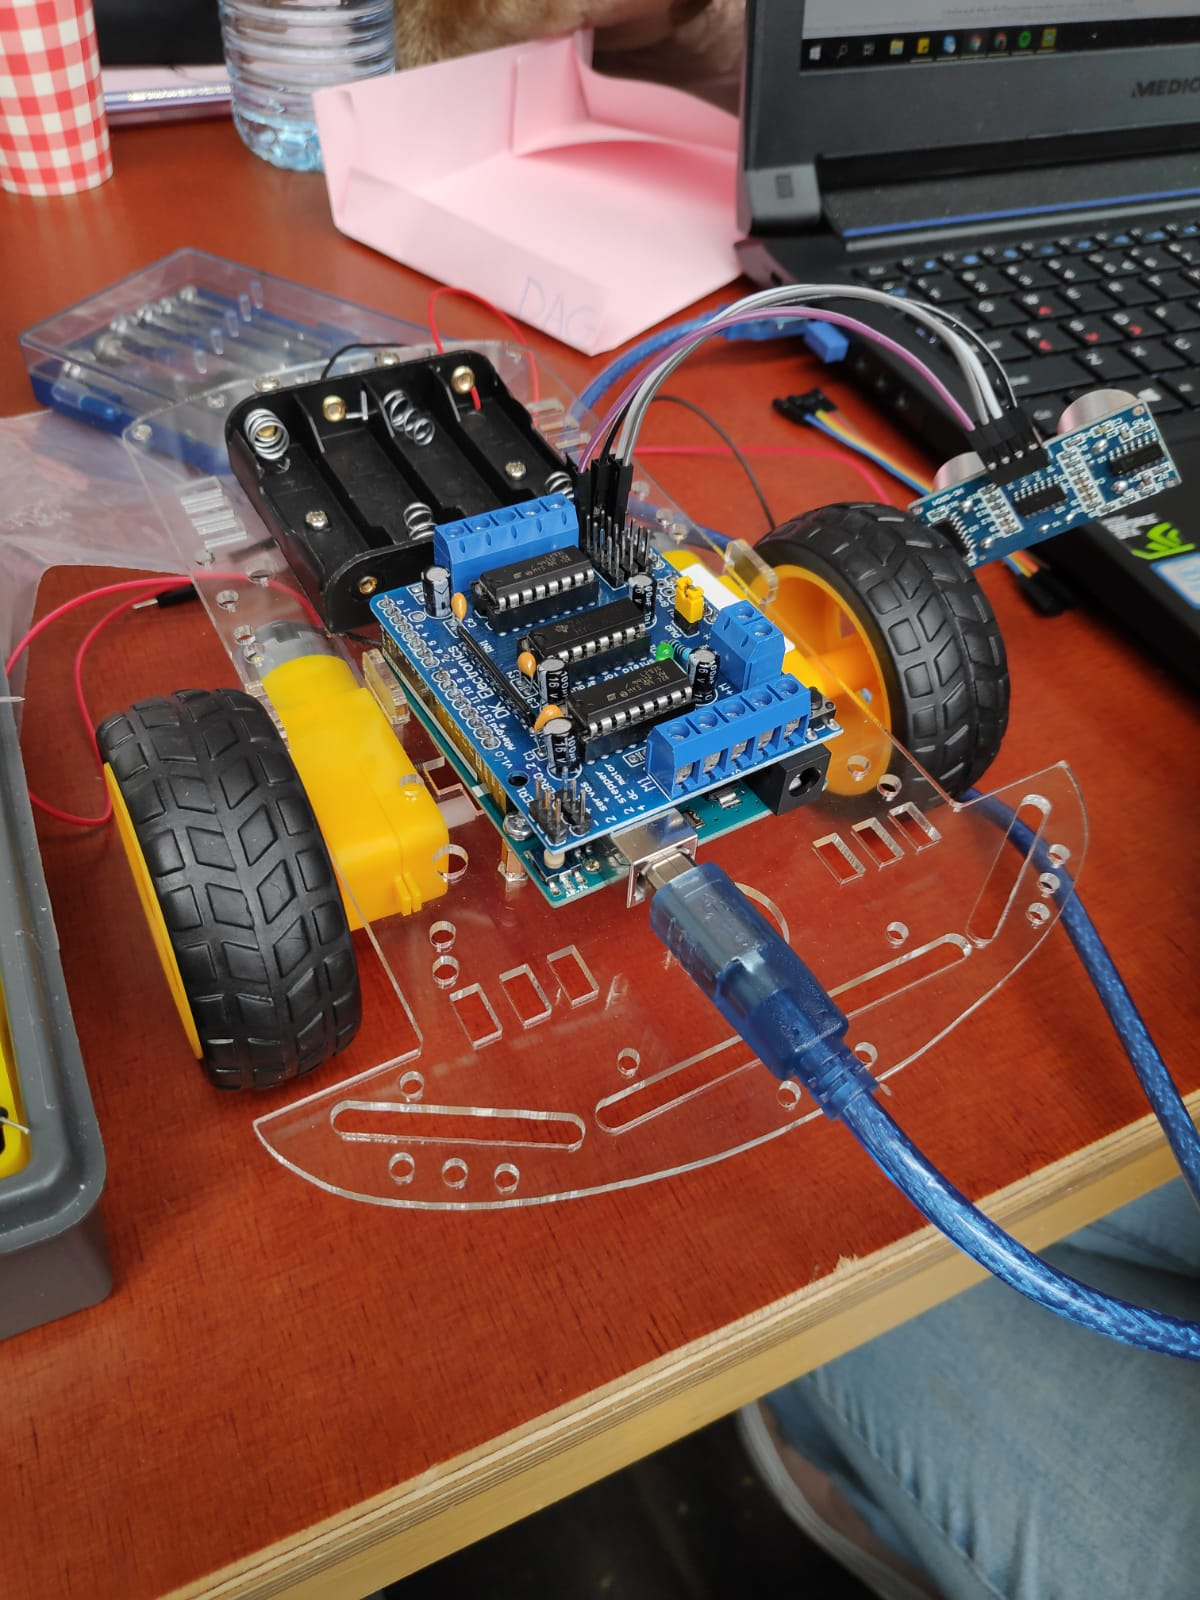
Today we started soldering the Arduino to the battery shield. We were helped by Emma.

The result:
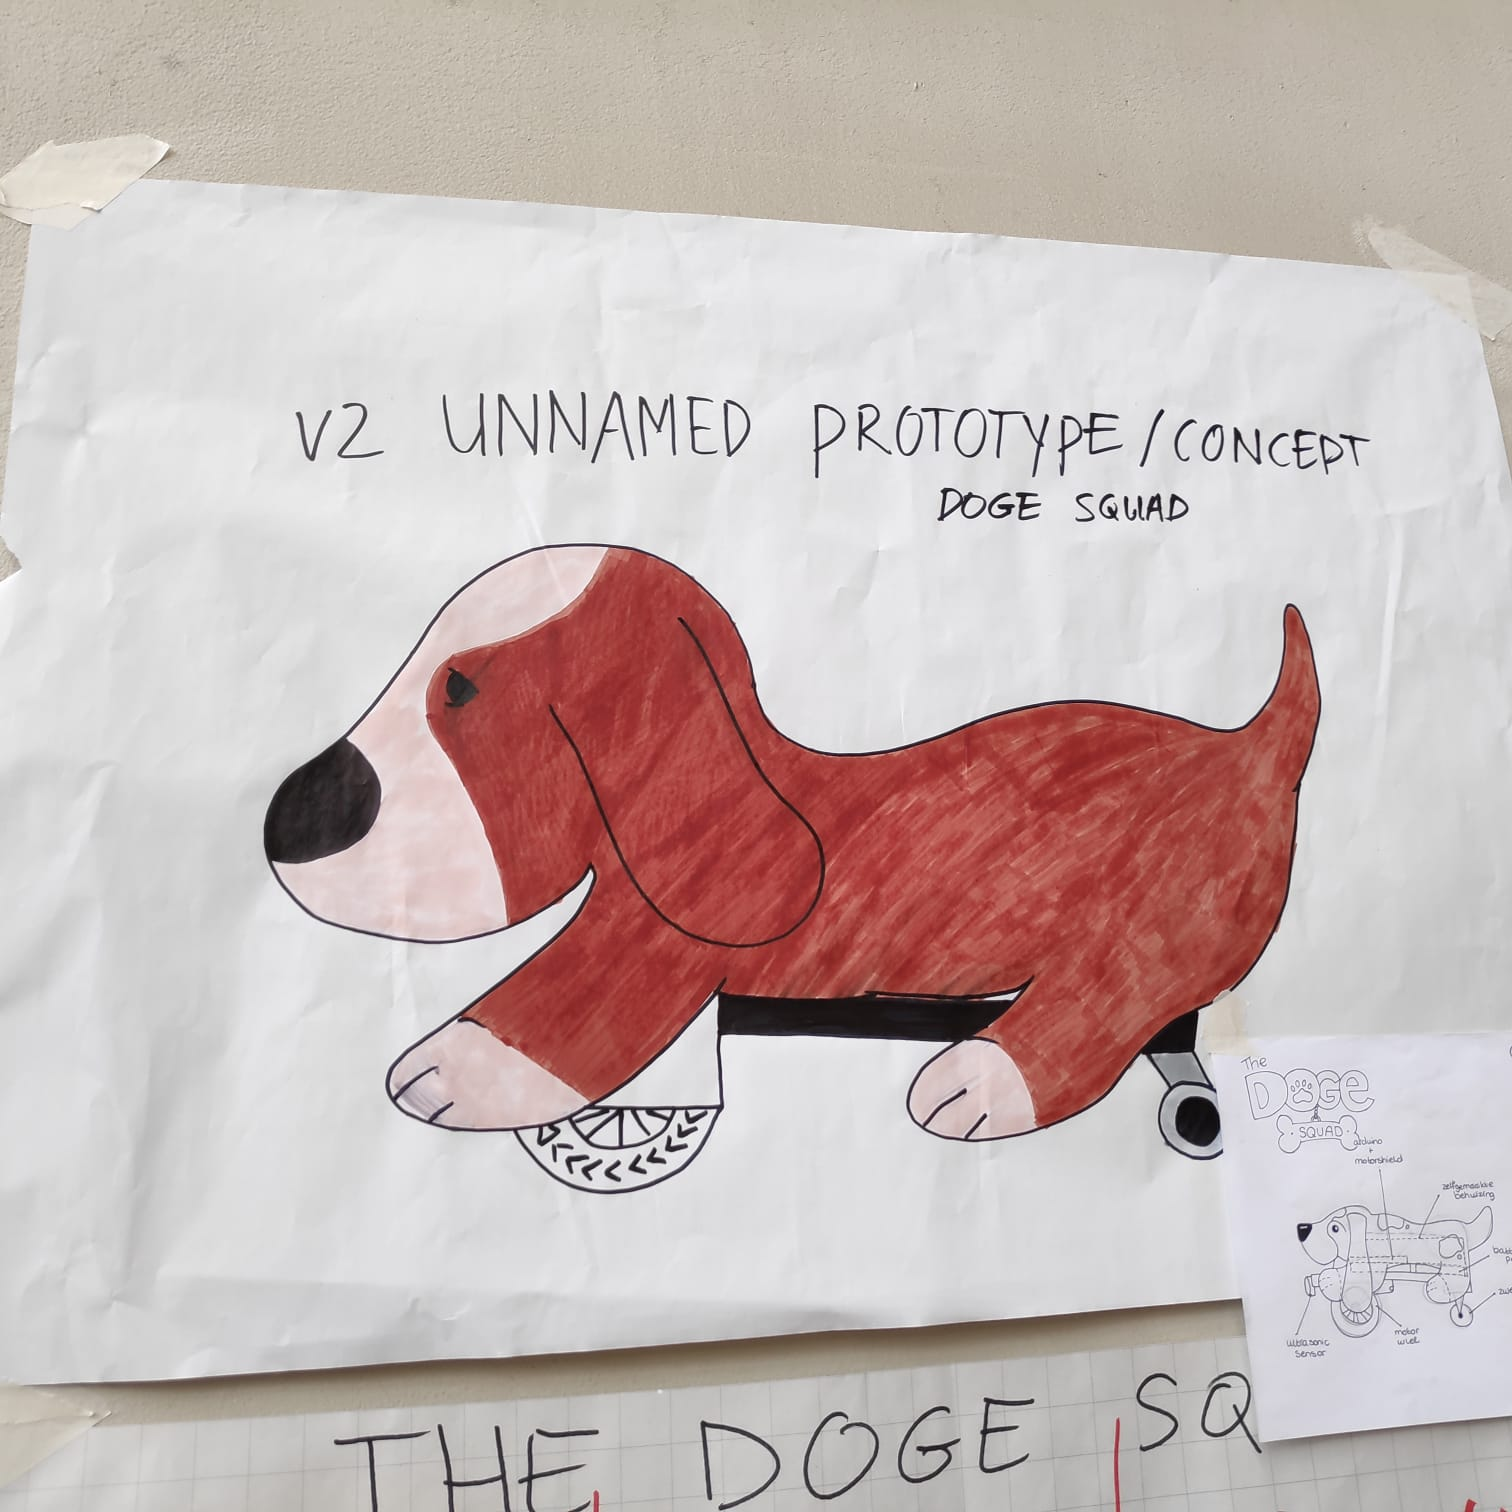
In addition to connecting the Arduino to the battery shield, we also looked at the driving itself. The car is not yet moving forward properly, although that is the intention. We currently use 2 wheels that provide the drive. In addition, there is a wheel on the back that can turn in all directions. We call that a ‘trailing wheel’. We think this does not improve driving. Ultimately, we want to see if we can also arrange a car with 4 wheels, so that we can prevent this problem. Other groups with 4-wheeled cars look promising in their tests. Nicolette, Dennis and I were mainly busy working on the car itself. In the meantime, Hiba and Danique were working on some concept art for our project. See images below.
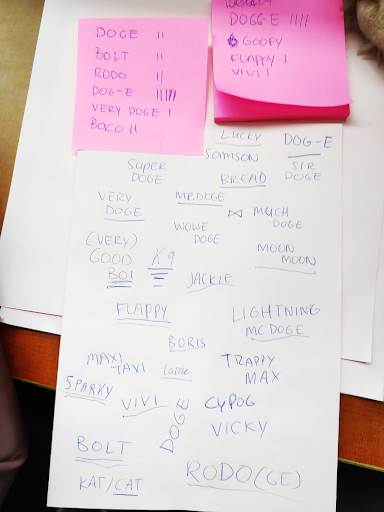
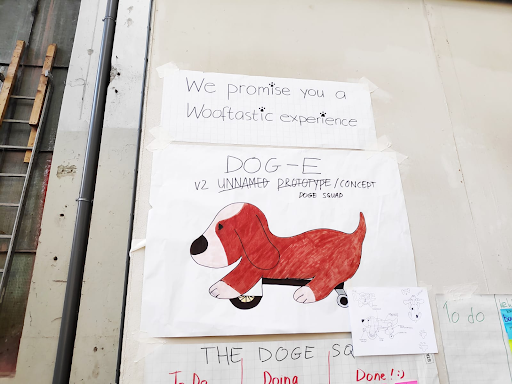
These names were made up by our group for the robot dog. I then went around with this list to see what people thought would be a suitable name for our project. In the end, a few more names were added that people suggested during testing.

Ultimately, this is the result of testing the name for the robot dog. DOG-E was by far the most popular name. While coming up with the names, someone said that the proximity sensors looked like WALL-E’s eyes. When I heard that I immediately thought of the name DOG-E. Not very original, but apparently people thought it was the best name on the list. In the image below we see the results of testing with the different names.
At the end of day 3 we placed a battery shield on the arduino. Soldering has been done to ensure that the two connect. The car was able to drive today without being attached to a cable. The batteries on the car provided the power for the engines. For tomorrow we will work on solving 2 problems. Firstly, the car does not yet drive straight ahead. To achieve this, we will see if we can use certain sensors that measure how much each wheel turns. That data is useful, because it allows us to adjust 1 wheel differently if that wheel rotates more than the other wheel. So this is a way in which we can make the car move straight forward.
The other problem we will be working on is mounting, using and testing the proximity sensors. We use that so that the car doesn’t crash into everything. We have already installed the sensors today. We have also been able to see in the IDE software that we are receiving certain data. However, nothing is yet done with this data. So we will have to come up with code for this.
We only work on 1 function at a time. On the advice of one of the guest speakers, we prefer to work on quality rather than quantity. Once DOG-E can move reasonably, we can decide as a group what the next functionality should be for our project.
Day 4
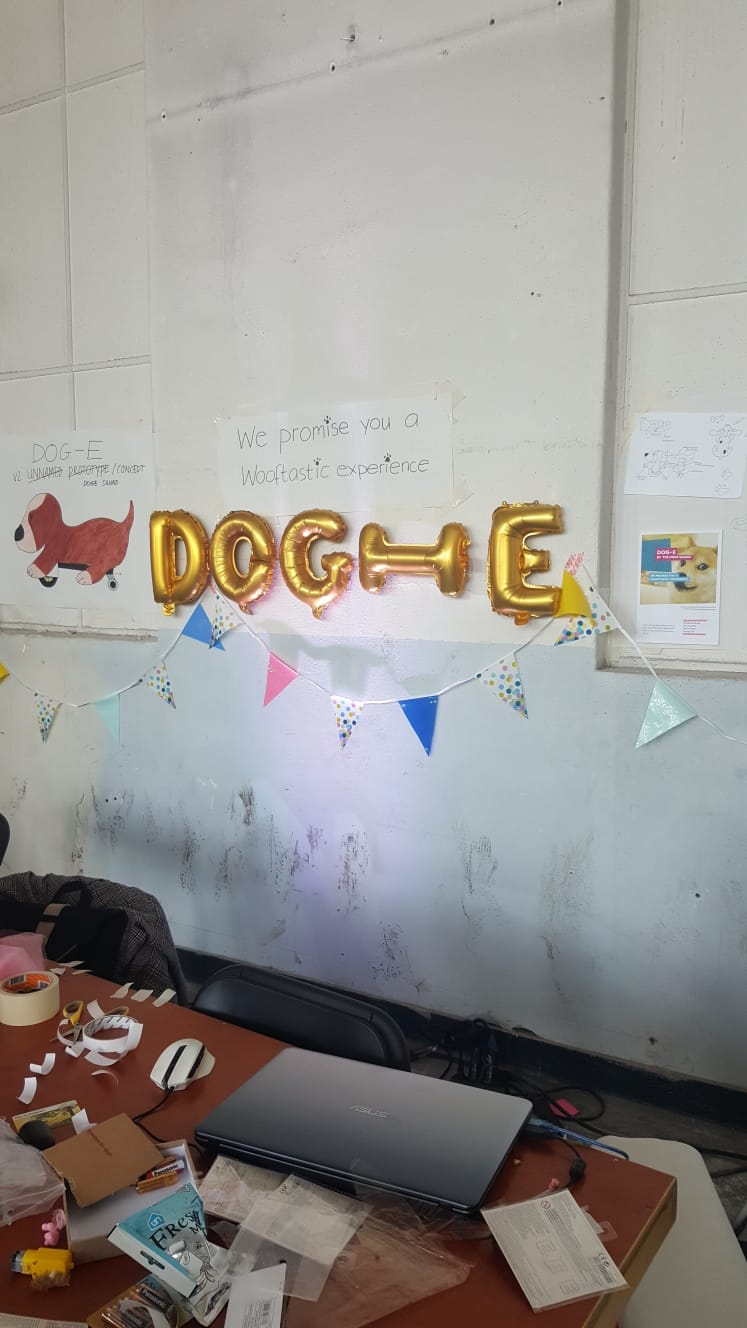
At the beginning of day 4, it was explained during the briefing that there had to be a promise. The promise had to be something related to your project. In the end we made a list of this again. We circulated that list to see which one was perceived as the best, just like with the name of our robot dog.
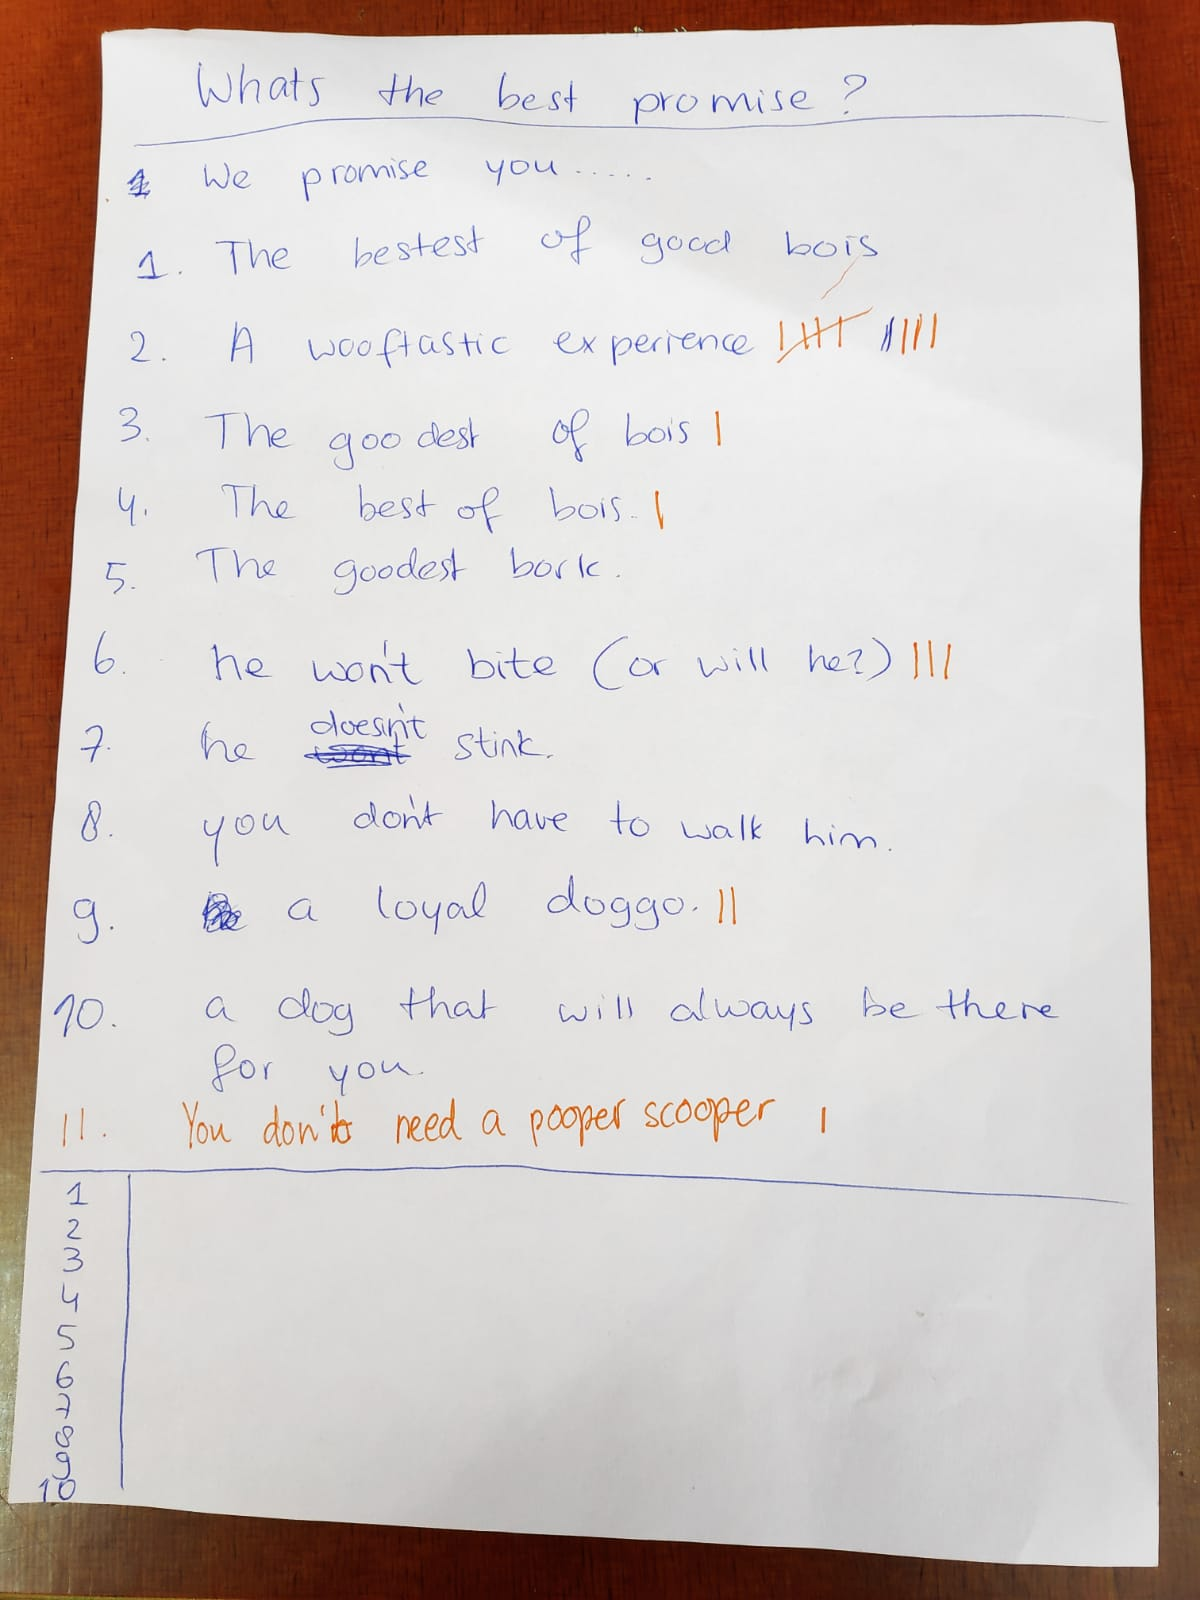
A wooftastic experience quickly came out on top in the test. However, there were a number of other things that we could take with us. For example, “a dog that will always be there for you” and “he wont bite” and “a loyal doggo.” We were advised to include this as features, rather than as a promise. Ultimately the promise had to be on a banner. I hung it above the poster. See image below.
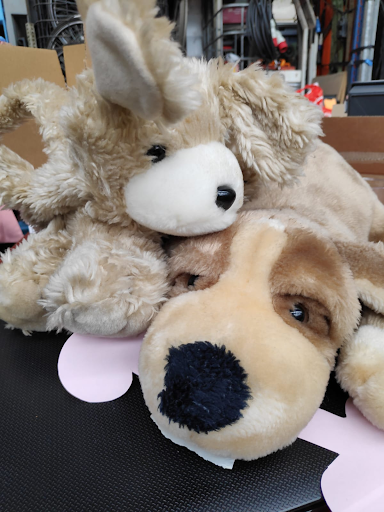
We also brought some cuddly toys today. Ultimately, the idea is that we mount everything on the car, and that you don’t see all the electronics because the cuddly toy is around it.
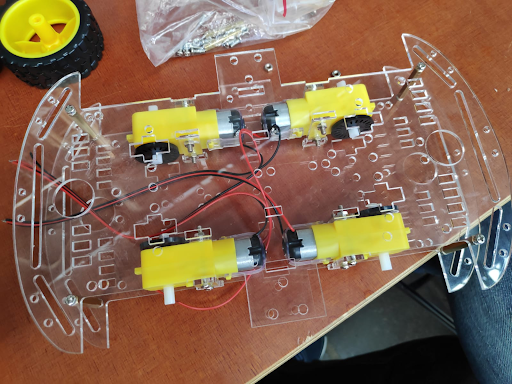
In addition, on day 4 we started converting the entire project from the car with 2 wheels + trailing wheel to a car with 4 wheels. We chose this because in practice it turned out to be difficult to get the car to drive straight. We suspected that it would be an improvement if we used 4 wheels because there were many people around us with a car with 4 wheels. They rode a lot straighter than ours. So the choice was quickly made. Below we see the chassis of the car. The 4 servo motors are already attached. You can clearly see the small black wheels on the inside here. We want to use this to ensure that the car drives even straighter, by using sensors. Because the real wheels and these small black wheels are on the same drive shaft, they rotate the same amount, so you can measure the same output. If you can measure output, you can also see whether everything is going well and you can ultimately make adjustments.
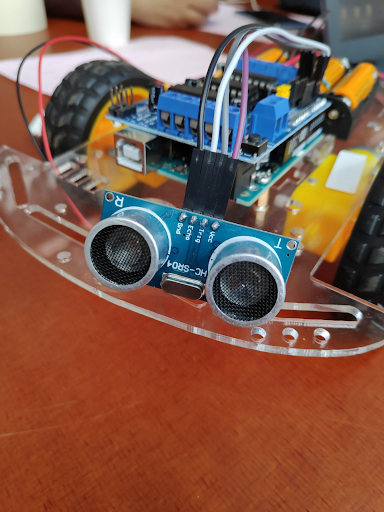
We also installed the proximity sensor today. See image above. We have also already linked the sensor to the software, so we have a new form of input. By using this sensor we can ensure that the car does not crash into everything.
Day 5
Day number five unfortunately started with a tragic sight. Our poster and promise had come loose when we were not present.
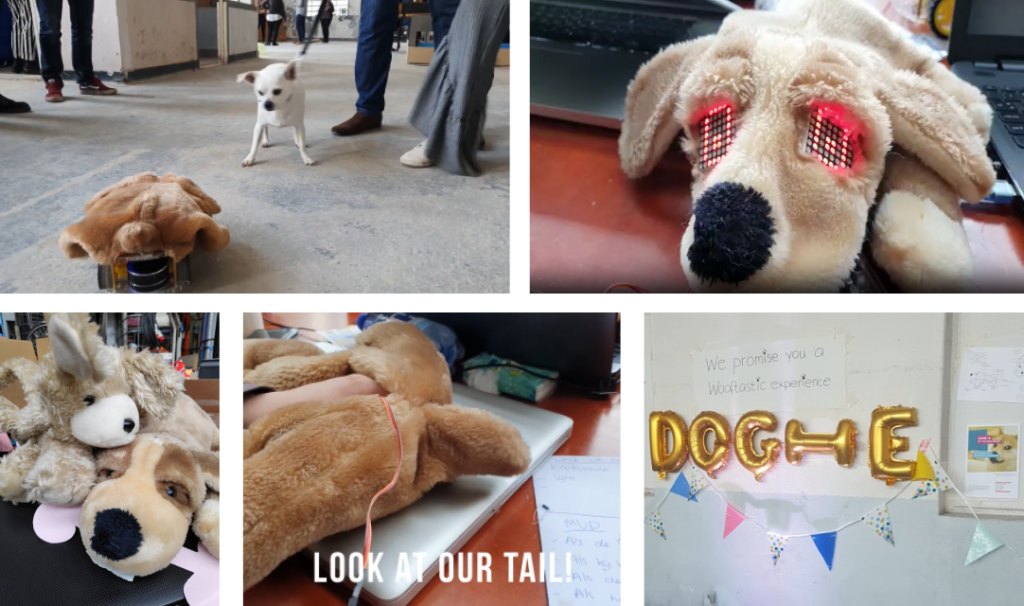
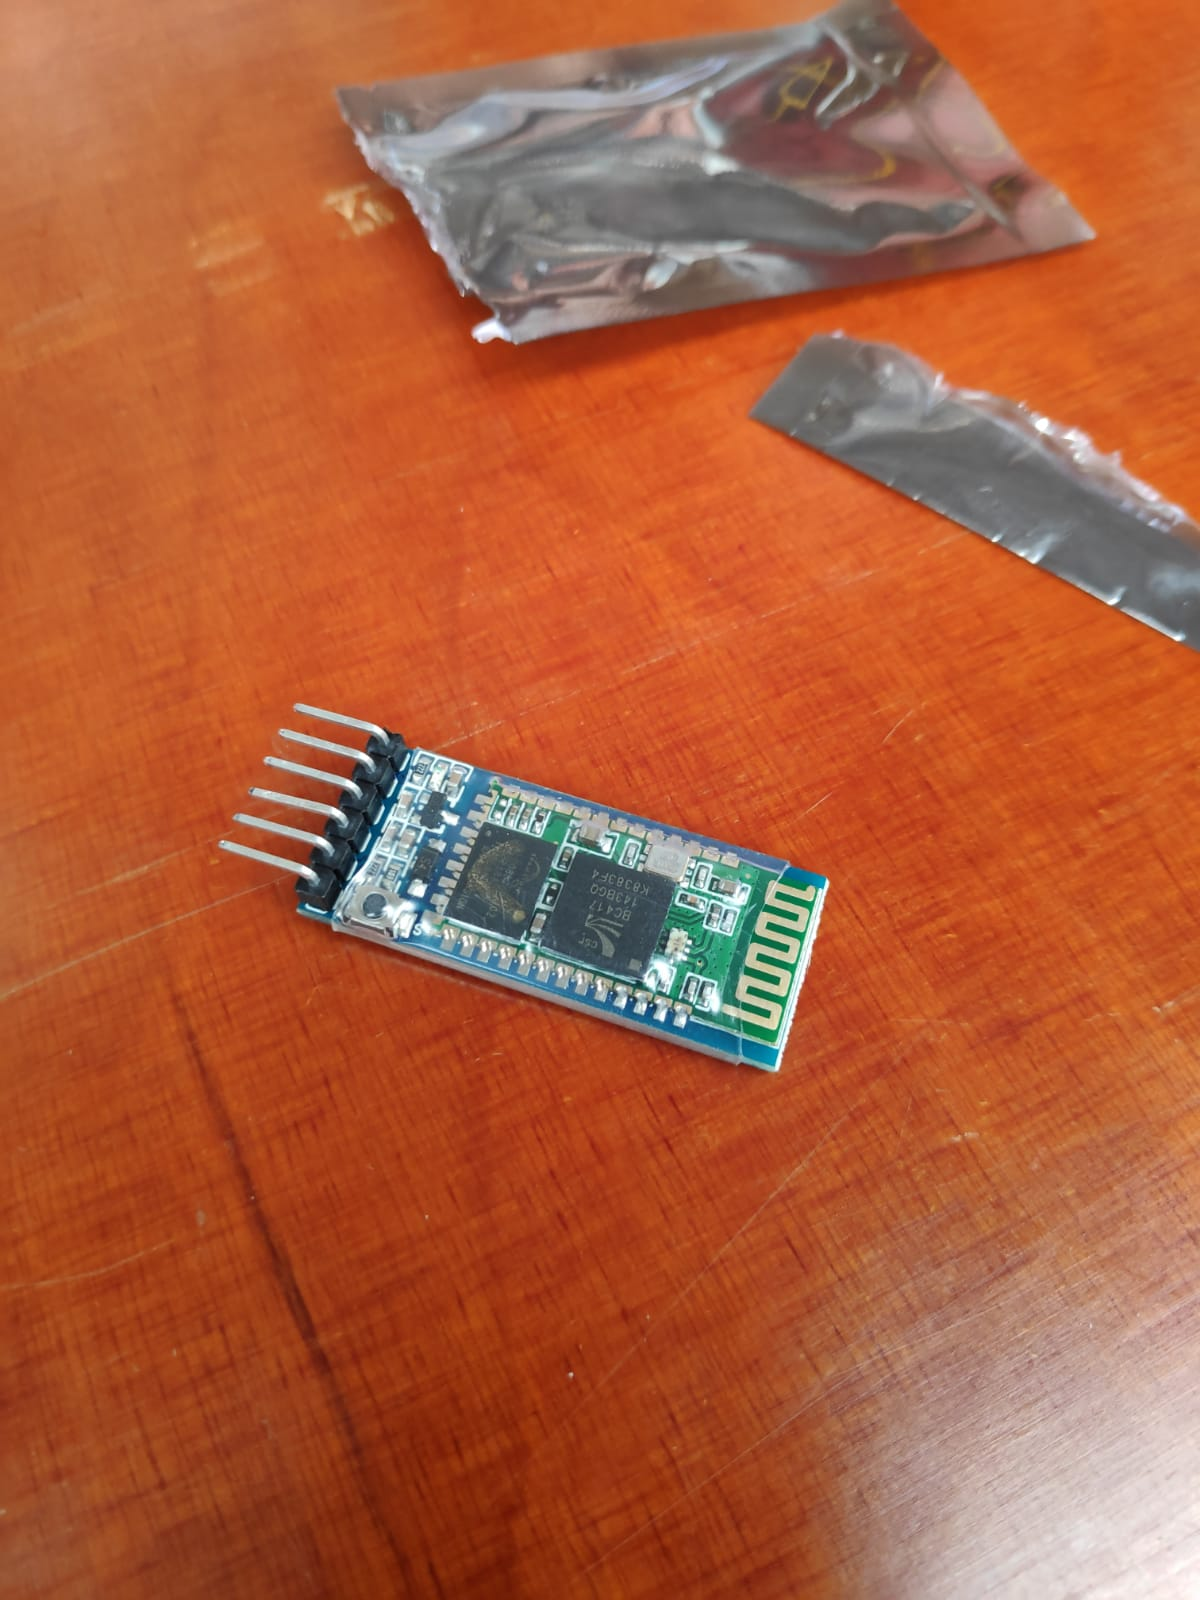
Today we will continue working on the car. For example, yesterday we attached the proximity sensor. Today the technical team will start programming the car. Now everything is still separate, the car does not yet use the sensor. The visual team is now working on the LED Matrixes. We received it on day 4. With this we want the robot dog to become a bit more playful. For example, by giving the dog a kind of face using LED lights that light up. Below we see the Bluetooth module. With this we want to steer the dog in the right direction when retrieving.
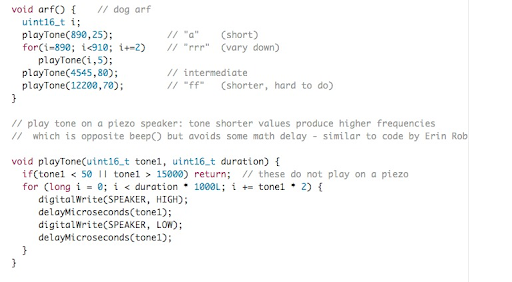
In the meantime, the visual team is working on a speaker so that the dog can bark. I received the code below from Danique. However, according to the visual team, it is not yet complete. For example, the sound does not sound loud and clear enough. In addition, it doesn’t really sound good to a dog.
Here we see that the LED matrix is being tested by the visual team.
Day 6
At the end of day 5 we had a moving car that did not crash into things due to the use of the proximity sensor. We were already very satisfied with this. Still, on day 6 we started coming up with new functionalities for the robot dog DOG-E. We actually saw the product we had so far as a minimum viable product. So at this point we had a little car that could drive forward. When an obstacle was encountered, the driver drove to the right and back to turn the car. This way the car could continue its adventure on its own. However, there were a lot of things that we were not completely satisfied with. So the car does not steer automatically, only when an obstacle is detected. We thought that was a shame, because we actually wanted the car to be able to do things that a normal dog could also do, such as retrieving or following a person. We looked at using sensors such as Bluetooth, GPS and WiFi but these all turned out to have problems for our use case. It was very difficult to have the car accurately follow someone or to find something. So in the end we had to scrap these ideas. We did come up with a number of ideas. Currently the car drives forward on its own, but you could also let the car drive forward if something is detected just ahead. We came up with a game with this, but it turned out not to be a suitable concept for a robot dog.
Ultimately, in consultation with a number of teachers, we decided to abandon these additional ideas. The focus was now on perfecting the minimum viable product. This is how we solved a problem: The wheels occasionally locked, causing the car to come to a standstill. This problem arose because there was also a wheel on the other side of the axle that was tightened too tightly. By loosening these wheels the problem was solved. However, we decided to remove the wheels completely because they no longer served any purpose for our concept. The goal was to make the car drive straighter. However, the car already drives straight ahead. In the past, the car occasionally did not drive straight because there was not enough power going to all 4 engines. In the photo below we can clearly see which wheels were involved. The wheels being driven have not yet been mounted in this photo.

In addition to fixing bugs, today we also worked on mounting the dog on the car. The visual team cut the dog cuddly toy in the right places so that it fits neatly on the car. Today we were also very busy thinking about the right packaging (what do we put where, etc). We had few parts at the beginning of the day but even less space. Ultimately we decided to use additional spacers. This moved the two clear pieces of plexiglass further apart, giving us more space for the parts. For example, we mounted the Arduino on the bottom of the top piece of plexiglass. This space was originally occupied by the engines, but this space became available after installing the extra spacers between the two pieces of plexiglass.
Ultimately, packaging is not interesting for the user because they do not actually see the technology. We also want the user to be able to see the technology as little as possible, because otherwise it disrupts the immersion. Still, it was an important step for us. The technical team and the visual team already had a number of functions ready that could be installed, but for which there was little space. So we had the LEDs that we wanted to use as eyes, an audio module with which we wanted to play barking sounds and a small servo motor that we had already successfully tested as a wagging tail. In addition, we also decided to order a small battery module for the next day. This saves us even more space, because we can go from 1 battery module and a power bank to just 1 module. We also ordered a proximity sensor, so that the car can also see behind it. This way we can also turn the car in extremely narrow environments. Personally, I immediately thought of the following scene from Austin Powers:
So at the end of the day we finally had a suitable, spacious, wireless car on which we could mount all the tested parts. See the video below for a short demonstration.
Tomorrow we will continue processing all the parts in the car, we will merge the code into 1 whole and hopefully we can more or less complete the project, so that we can put the finishing touches on Thursday and Friday.
Day 7
Today the ordered parts arrived at the manufacturing port factory where we were working. So we started assembling the dual battery unit. It had room for 8 batteries, instead of the 4 we tried to work with before. We had a lot of problems with batteries. If you just used new batteries, you had to reduce the driving speed in the code. Otherwise the car was going too fast. The problem, however, is that the batteries slowly run out. This makes the car go slower and slower. So you have to solve this by making the car faster again in the code. Ultimately, that wouldn’t be very useful if we had to show our product for 4 hours. That is why we made the choice to use 8 batteries. Ultimately, testing showed that this made the car go much faster. So in the code we had made the car even slower. What was a problem was the fact that individual batteries were running out, rather than all batteries at the same time. One of the other groups had a battery meter, so we could measure how much energy was left in a battery. This showed that we only had to replace 1 battery each time, but that this had to be done very often.
I also started merging the code today. We wanted the robot dog to have a number of functions that had to work simultaneously. For example, we wanted the dog to be able to move, blink its eyes and wag its tail. On the previous days we had already developed these functionalities individually, but not yet combined them into one whole. This turned out to be extremely difficult to do. because we were working with only 1 arduino. The problem lies in how an Arduino can be programmed. You always start with a setup, which the Arduino executes once. Then there is an endless loop. We tried to put all the individual parts together in the loop. However, this was not useful because it gave us all kinds of problems/bugs. The dog first looked to see if there was an obstacle in front of it. If that was the case, the dog would drive backwards. This ensures that the dog does not crash. Then the dog started driving, depending on the data from the proximity sensor. Then we had the blinking and wagging. The problem with this, however, was that it slowed the entire loop down tremendously. So the dog continued to drive, while the blinking and wagging also happened. This caused the driving to take too long, causing the dog to react extremely slowly to obstacles.
We did successfully get all the parts into the car today. So the LED lights, wagging tail and larger battery have all been given a place. Tomorrow we will continue merging the code so that driving runs better in practice.
Below is a video in which we test driving and wagging at the same time:
Day 8
Today we indicated where we want to show our product during the expo. We have also continued to improve the robot dog. Today we had a new problem. The Arduino therefore works with a setup phase and then a loop that continues continuously. However, today something was wrong that caused the Arduino to reset very often. This caused the Arduino to start again at the setup phase. This often happened when the dog detected something with the proximity sensor. Unfortunately, we were unable to fix this bug today. So today we were mainly busy continuously adjusting code, uploading code to the Arduino on the robot dog so that we could test everything. Below is a photo taken by Danique, where we see Hiba testing the proximity sensor/row code.
One of many testing sessions:
Day 9
Today is the last day, and therefore also the day of the exhibition. Before the expo started, I was still working on improving the code. So I found code that allows us to make the car drive better. This was very successful in practice during a number of tests. The problem, however, was merging the code of the LED and the tail. Because you work continuously with an Arduino loop, you cannot add code without extending this loop. Ultimately we decided to just use the robot dog. So the version we finally showed could move, blink and wag. However, moving was not as smooth as we had hoped.
Today was the day of the expo. We decided to dress everything up a bit, so that people have a better experience during the expo. For example, someone had brought streamers. Below we see our stand.
During the expo we decided to put the robot dog in the arena of our rival group. They had more or less the same concept as us, but with a crab. Putting the robot dog in the arena was a lot easier, because the dog didn’t just drive around the entire room. This meant we bothered fewer people.
Product
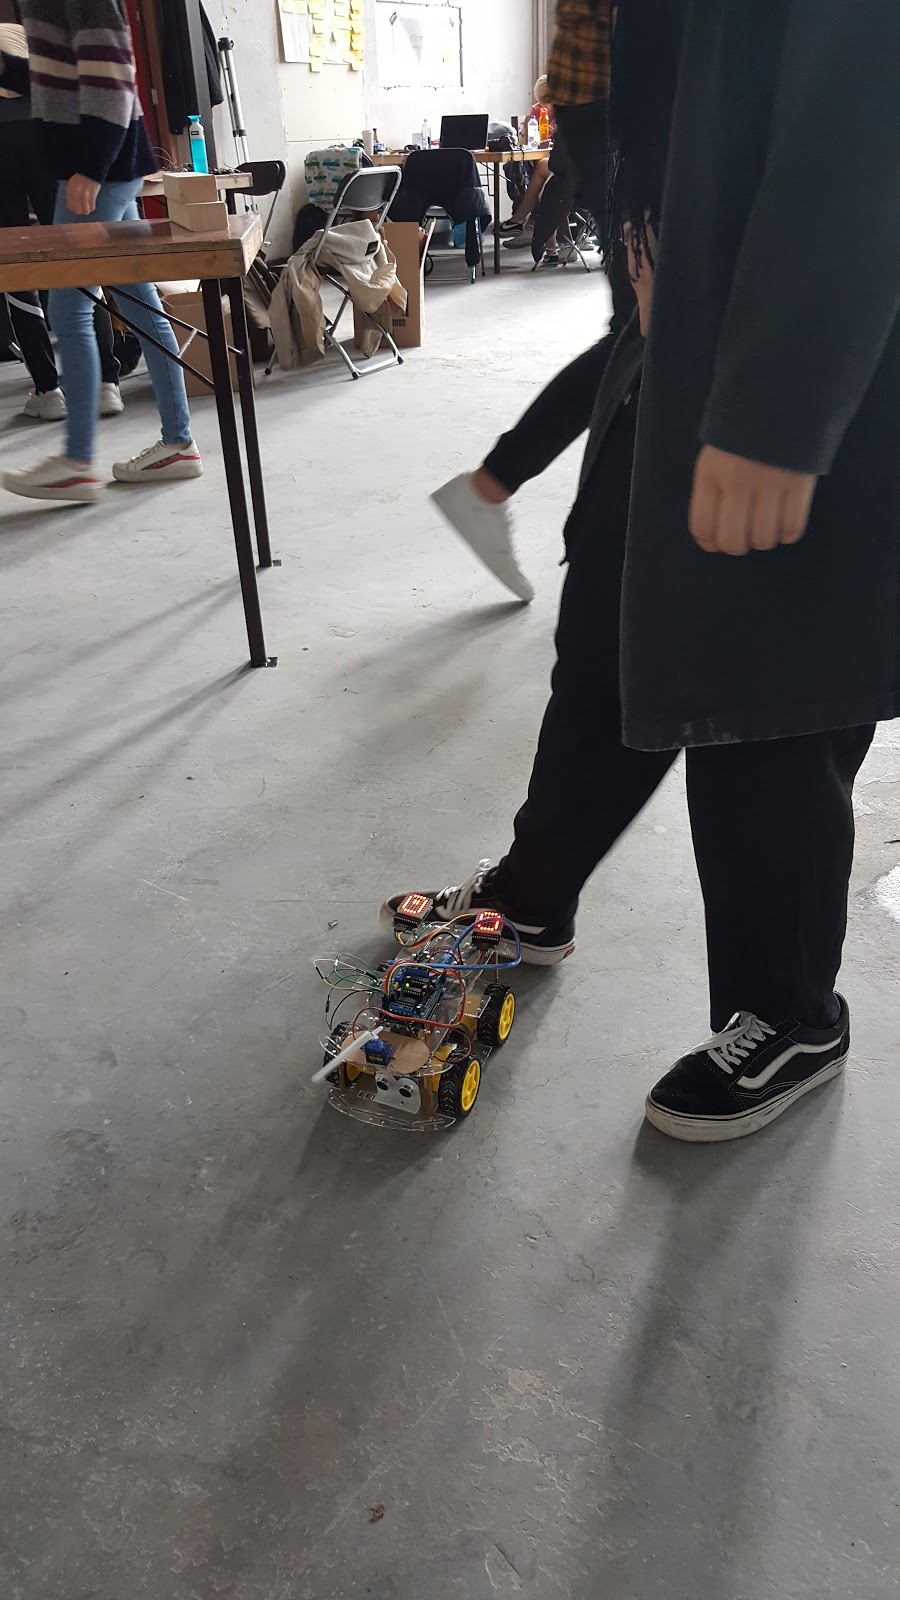
Our robot dog DOG-E can drive around by itself. He usually does this without bumping into anything. By working with a distance sensor, DOG-E can automatically see whether it is about to bump into something. If that is the case, DOG-E does not drive straight forward but makes a rotating turn backwards. Unfortunately, measurements are not taken often enough, which means that DOG-E sometimes bumps into something. In addition, DOG-E can wag its tail and wink, which people really liked.
Our goal with this project was to build an artificial creature. The many positive reactions showed that this had been successful. Children and dogs in particular found it very interesting to play with DOG-E. Adults especially enjoyed testing whether DOG-E would bump into them or not. DOG-E was usually very good at avoiding people who stood in front of him with their shoe. I’ll put it this way: 90 percent of the time, it works everytime. I think as a group we can be satisfied with the result. We learned a lot about how to deal with both software and hardware in a practical way. We received nice reactions during the exhibition. We have made mistakes from which we have learned. In short: A successful learning process.
Aftermovie
Reflection
I ended up spending a lot of time during these two weeks coding and testing robot dog DOG-E. I learned a lot from this. In the end I was very sorry that I was not able to get the dog the way I wanted it to be. The goal was to build an ‘artificial creature’. That’s very abstract, but the main goal I personally had was to make something that people actually thought could be ‘real’. I think that goal has not been fully achieved. For example, halfway through the expo our robot dog stopped working due to problems with the batteries, the dog’s behavior was extremely predictable and the dog responded very slowly to obstacles.
In retrospect, a solution to this last problem was to simply use 2 Arduinos. I struggled enormously in the code with the fact that you could only use 1 loop. Ultimately I tried to solve a hardware problem with software. In the end, it wasn’t until day 9 that I noticed that there were other people who had solved this problem by using multiple Arduinos. I heard from many people that they worked a lot side by side, and that was a shame. You were constantly trying to reinvent the wheel, while another group had already done that. By working more together with other groups we could have solved certain problems more quickly.
I also found it difficult to work on something with 5, and later 4, people at the same time. Most of the work was done on the robot dog itself, and there was often only physical space for 1 or 2 people. I was often someone who was involved in this, so personally it didn’t bother me much. Yet it is important that as a group you work on something at the same time. You want to prevent people from having nothing to do. There was a serious lack of leadership in that regard. If there was someone who could come up with tasks and then distribute them, we could have done more. A lot of work was done on the robot dog itself, but we could have done other things. I think, for example, of the arena that the other group had made, or of promotional material (posters, illustrations, storyboards or a comic?).
Despite this somewhat critical reflection, I did enjoy myself during the lab weeks. As a group you spent the whole day working on a fun, self-designed joint project. Occasionally there was room to ask for feedback, you could see what other groups were doing and you got to know new people. I learned how to work with Arduinos, how to make choices for your project in a group and I enjoyed some technical work.